
The Complete, Always-Updated Guide to Facebook Advertising


Former VP of Marketing @ Buffer
Social media has been found to be the most effective digital advertising channel for getting more impressions, clicks, and conversions. Facebook in particular stands out — in some cases, 7x cheaper than the next most affordable social media ads channel (Twitter).
You can spend as little as $5 per day on Facebook advertising and see significant results.
Sounds great, right!
We’d love to make it easy for you to get up and running with Facebook Ads. These are the exact steps and lessons we’ve been taking to build up our own paid ads campaigns, and we’ll be keeping this post up-to-date with the latest news and learnings.
Got any ideas on how to make this post better? We’d love your comments! Drop us a line here and we’ll review and update the post (and give you a shoutout!).
Download the PDF of this guide
Want to save this guide for later? You can download the PDF for free here.
How to navigate this guide
There’s a lot to learn with Facebook Ads! And I know I’m going to leave a lot out. This article is our best shot at covering all the important aspects of Facebook advertising for someone who is just starting out. To make it easier to digest, we’ve broken this guide down into four chapters. Here’s where to find any info you might need:
Chapter 1: An Introduction to Facebook Ads: a high-level look at the factors businesses and brands consider when choosing Facebook ads and some quick tips on getting started with ads.
Chapter 2: How to guides: Information and screenshots on where to find everything and how to get set up with the various types of Facebook ads.
Chapter 3: How to choose an audience for your ads: Audience targeting is where Facebook advertising can become truly powerful and significant. Here we show you how to find the right audience for your ads.
Chapter 4: Budgeting, Analysis, and Successful Strategies: Hoping to answer the question “What am I supposed to do here?” Strategies for audience, budget, ad types, messaging, and visuals.
Chapter 1:
An Introduction to Facebook Ads
All the basics you need to get up and running with Facebook Ads.


First things first: Why use Facebook ads?
Facebook Advertising is now one of the most effective tools out there to grow your business, create loyal customers, and generate leads and sales. There are now over 3 million businesses advertising on Facebook and there’s never been a better time to start than now.
Here are just a few reasons why Facebook Advertising is hugely exciting for marketers:
- Audience size: Facebook now boasts over 1.13 billion daily active users on – 1.03 billion of which access the social network via mobile devices.
- Attention: People spend a lot of time on social networks. The average user spends about 50 minutes just on Facebook, Instagram, and Messenger every day.
- Organic reach decline: Organic reach on Facebook has been in decline for a few years now and has almost hit zero. If you want to break through now, Facebook is all but a pay-to-play network.
- Targeting: The targeting options within Facebook Ads is incredible. Business can target users with by location, demographics, age, gender, interests, behavior, and much more.

Pros and cons of Facebook advertising
Before we get too deep into the specifics of Facebook advertising, I wanted to share this amazing list of pros and cons from the Moz blog, which was so helpful in our deciding how to pursue Facebook Ads for Buffer.
Pros
- Campaigns are easy to track
- Immediate influx of traffic
- Complete control over your daily budget and maximum Cost-per-click
- Instant return on investment (You can easily define a cost per conversion and understand what your profit is)
- More targeting options, including, towns, regions, age, likes/interests, income bracket, and other demographics
- Easier to set up than Google AdWords
- The ability to reach people early on in the buying process, before they are aware of their need, while capturing those who are aware of the need in a subtle way
- You can use images and videos to capture the interest of your target market, helping you to sell your products and services
- CPC is relatively cheap, depending on your industry (On average, no more than $0.61 per click)
Cons
- If set up and managed incorrectly, it can be costly, but less so than Google AdWords
- Depending on your target market, the majority of the large potential audience can be irrelevant (For instance, we would not recommend Facebook Advertising if someone only served or supplied their products and services to one town)
- There is no option to target your ads at certain times within the day or on certain days of the week unless you choose a lifetime budget
- Most suitable for those operating in B2C markets
- Reaching people too early in the buying cycle could potentially reduce your goal conversion rate
Getting started
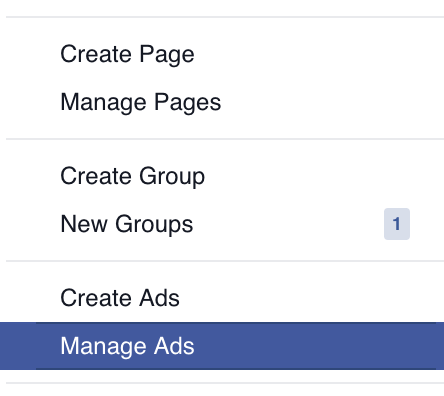
To get to your Facebook Ads dashboard, you can head to https://www.facebook.com/ads/manager or click the dropdown arrow in the upper-right corner of Facebook and choose “Manage Ads” from the drop-down.
Finding your way around the dashboard
From the ads dashboard, you’re able to manage every aspect of your Facebook ads experience. There’s a lot here! This is where to find all the essential tools, menus, and buttons.
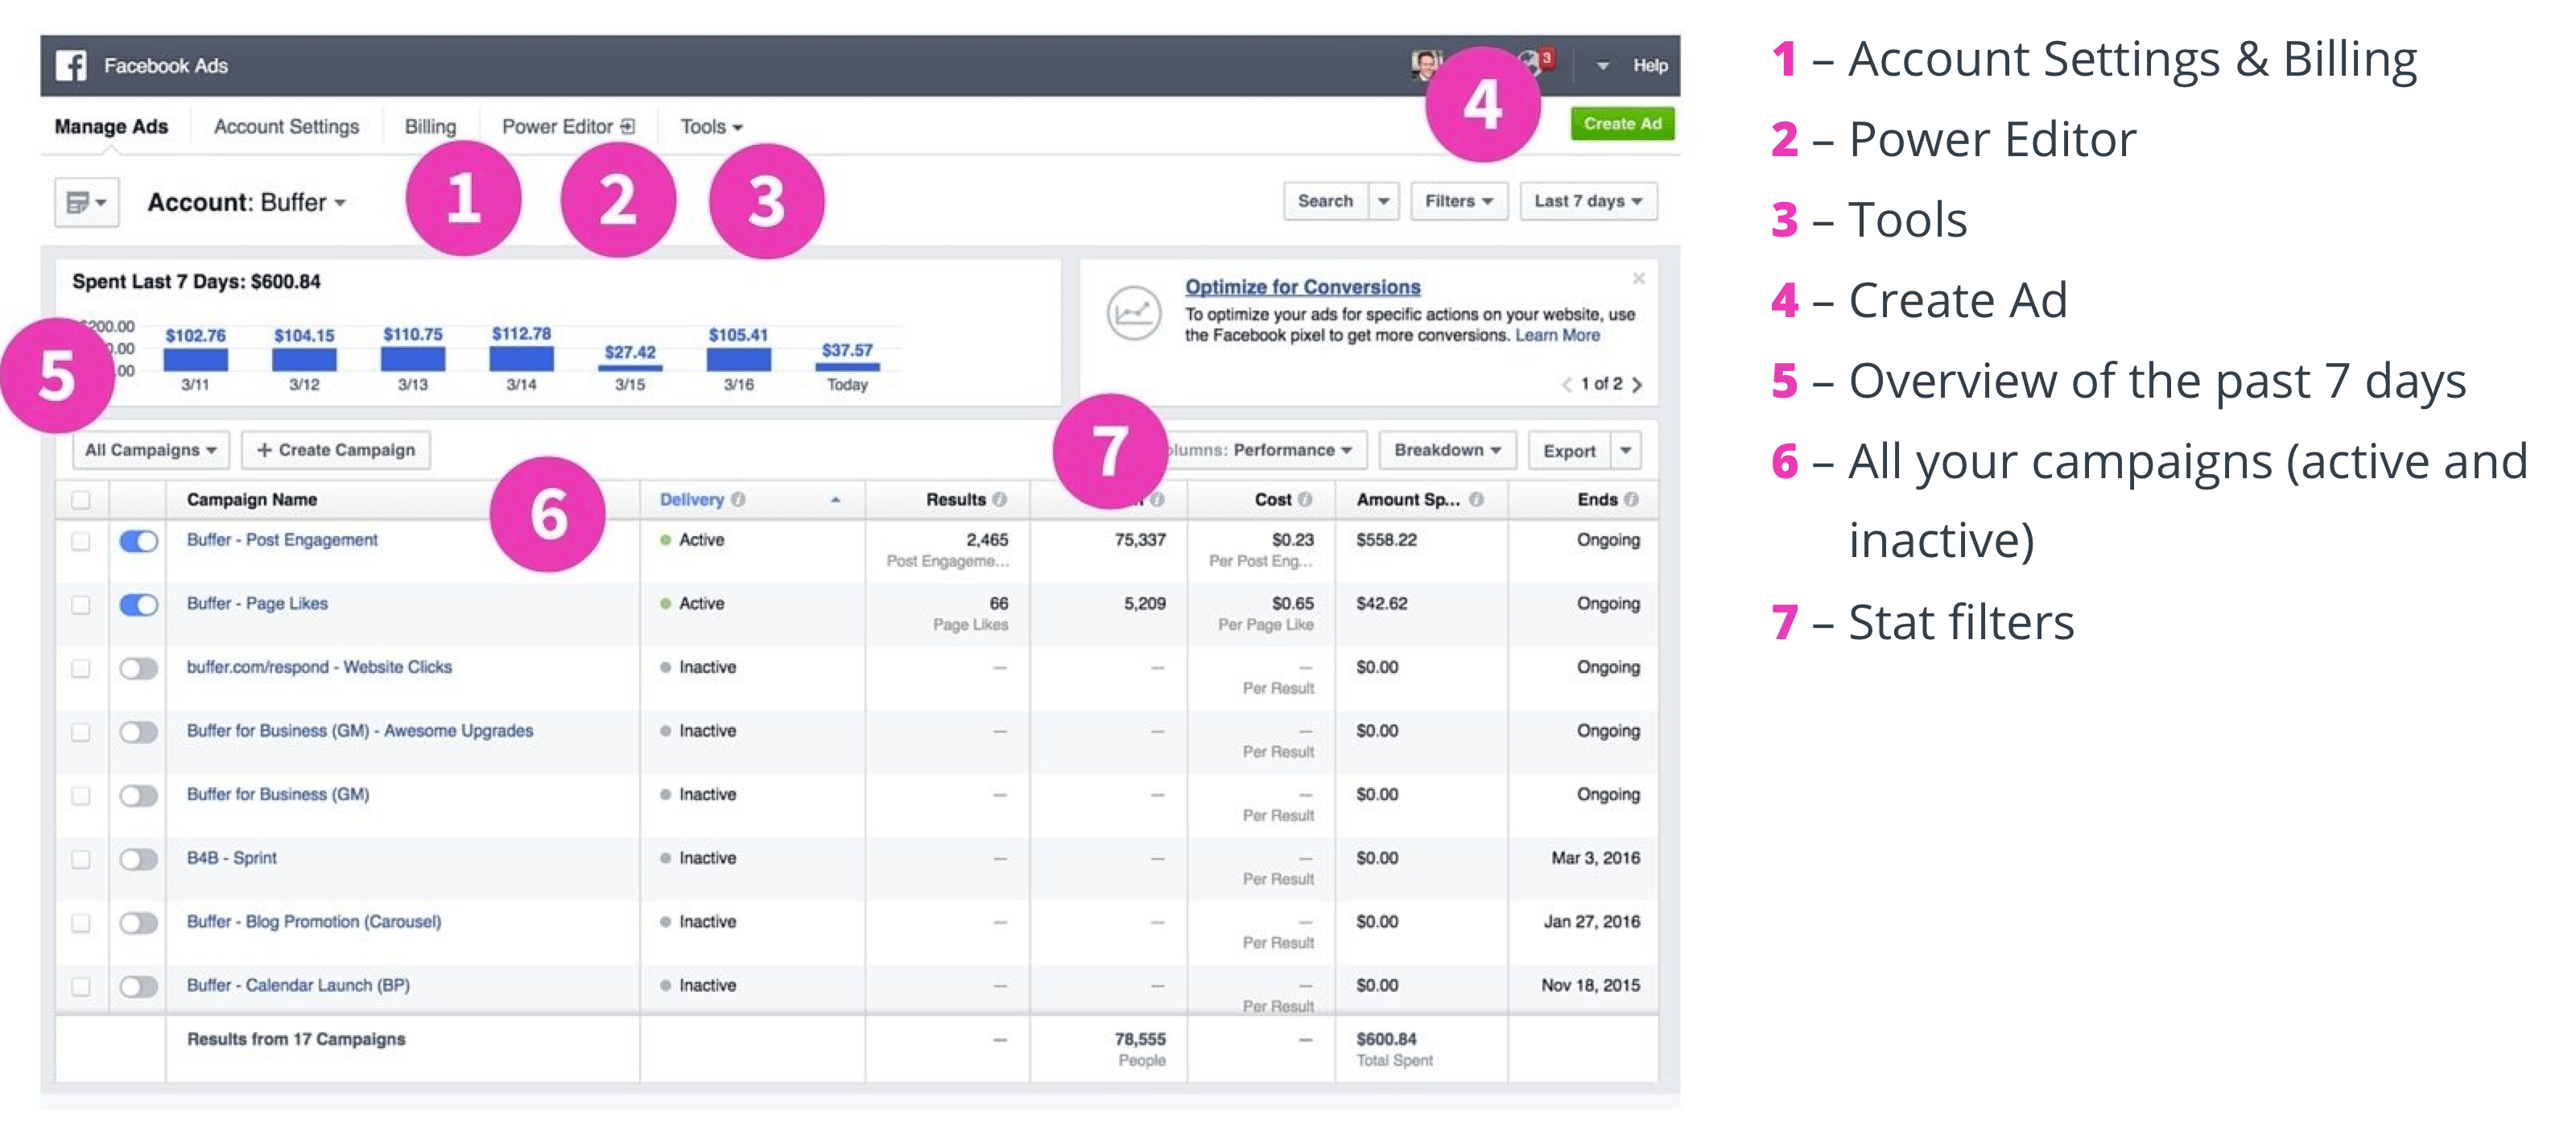
We’ll get into each of these options in the article sections below. Feel free to use CTRL+F or CMD+F to find any exact phrase you need.
The 11 different types of Facebook Ad
(And How To Set Up Each One)
Facebook Ads are extremely versatile and there are now 11 different variations you can use to solve a whole host of business problems from driving traffic to your website to reaching people in your local area.
Below is a list of the various Ads available to Facebook advertisers and throughout this chapter, we’ll walk you through each type individually.
- Boost your posts
- Promote your Page
- Send people to your website
- Increase conversions on your website
- Get installs of your app
- Increase engagement in your app
- Reach people near your business
- Raise attendance at your event
- Get people to claim your offer
- Get video views
- Collect leads for your business
How to choose your ad type
When you go to create a new Facebook ad (by clicking the green button on your ads dashboard), you’ll get to choose among these 11 different options, all of which with a unique focus for growing your business or your page.
The general setup for each will be similar: You’ll go from choosing the type of ad (the objective), to choosing the audience and the budget (the ad set), to making the ad itself (the ad).
Here’s a quick run down of each of the 11.
1. Boost your posts
What’s involved:
After you click to create a new ad and choose “Boost your posts,” the next steps are:
- Choose one of your Facebook Pages or enter its URL
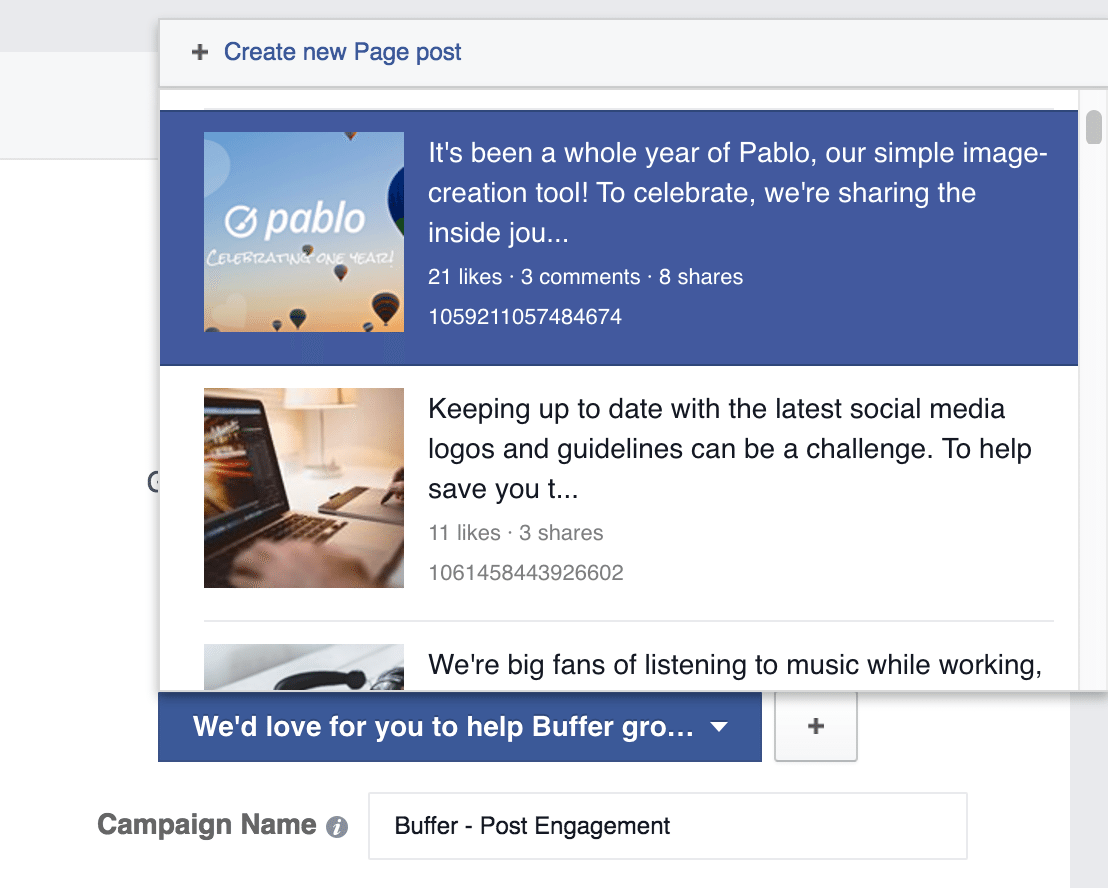
- Select a previous update that you’ve published to your page (or create a new update)
- Give this campaign a name
At the next step, you can set your audience and budget. (Jump to the section in this post about audience and budget.)
After setting audience and budget, you can move ahead into the ad creative. The good news with boosted post campaigns: The ad creative is already set for you! The creative is the post!
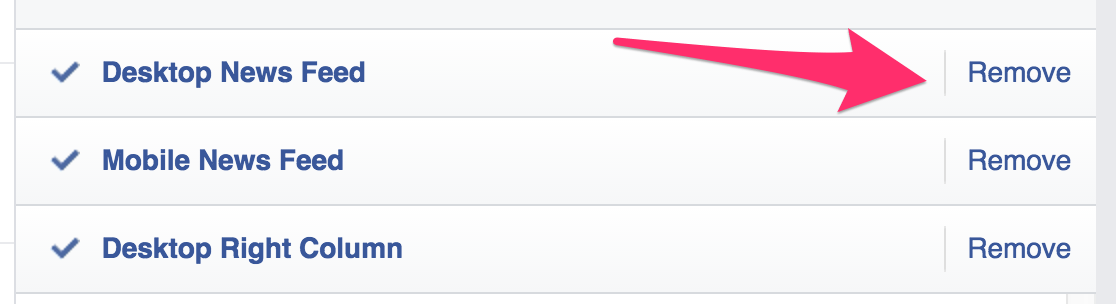
From this screen, you can change the post you’d like to boost, and (here’s the most hands-on part of this step) you can view how your boosted posts will look in three different locations within Facebook:
- Desktop News Feed
- Mobile News Feed
- Desktop right column
Within the Ad Preview, you can click to view each location:
And from here, you can also set which locations you’d like your ad to appear. For any spots you’d rather not show your ad, click the Remove link to the right of the preview.
2. Promote your page

What’s involved:
After you click to create a new ad and choose “Promote your Page,” the next steps are:
- Choose one of your Facebook Pages or enter its URL
- Give this campaign a name
At the next step, you can set your audience and budget. (Jump to the section in this post about audience and budget.)
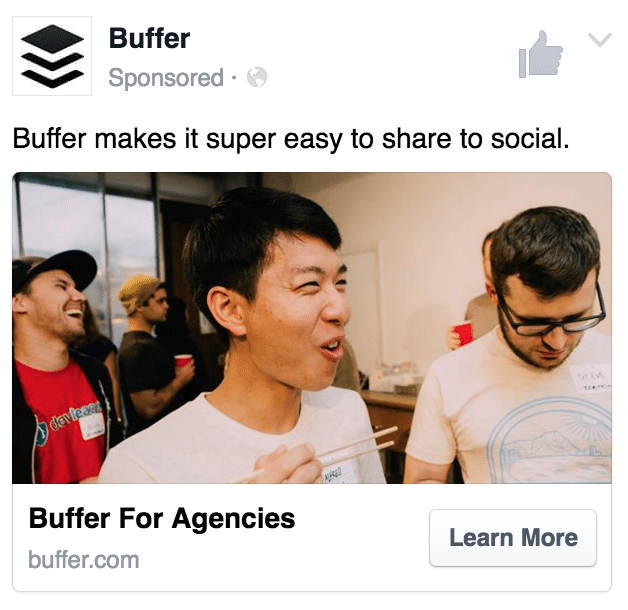
After setting audience and budget, you get to set the creative elements of the ad: photo, text, and more. First off, you’ll be asked to select an image to use; you can choose to upload your own, select from a collection of searchable stock photos from Shutterstock, or pick from a library of images you’ve used on previous ads.
To easily create variations of your ad and test how different images perform, you can create up to 6 ads at once by uploading multiple images from this one screen.
For choosing images, Facebook offers these guidelines:
- 1,200 x 444 pixels (width and height)
- Image ratio: 8:3 (basically, if you divide the width of your image by 8 and the height by 3, the result should be the same)
- Your image is best with minimal test, ideally 20% or less of the image should be text
This last guideline is an interesting one! Up until a few weeks ago, this was a rule, rather than a guideline. Ads would be rejected if the image exceeded 20% text.
Facebook has since softened its stance on this. As Jon Loomer reported:
Your ads will no longer be rejected for having too much text. However, the more text in your image, you can expect less distribution and higher costs.
The 20% guideline was put in place for a very good reason: Facebook is mindful of the aesthetic of having ads appear on its network and wants to ensure the highest quality and best experience possible for its users. Facebook users prefer ads with less text.
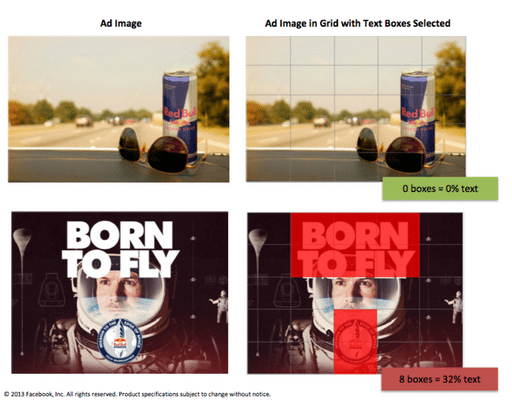
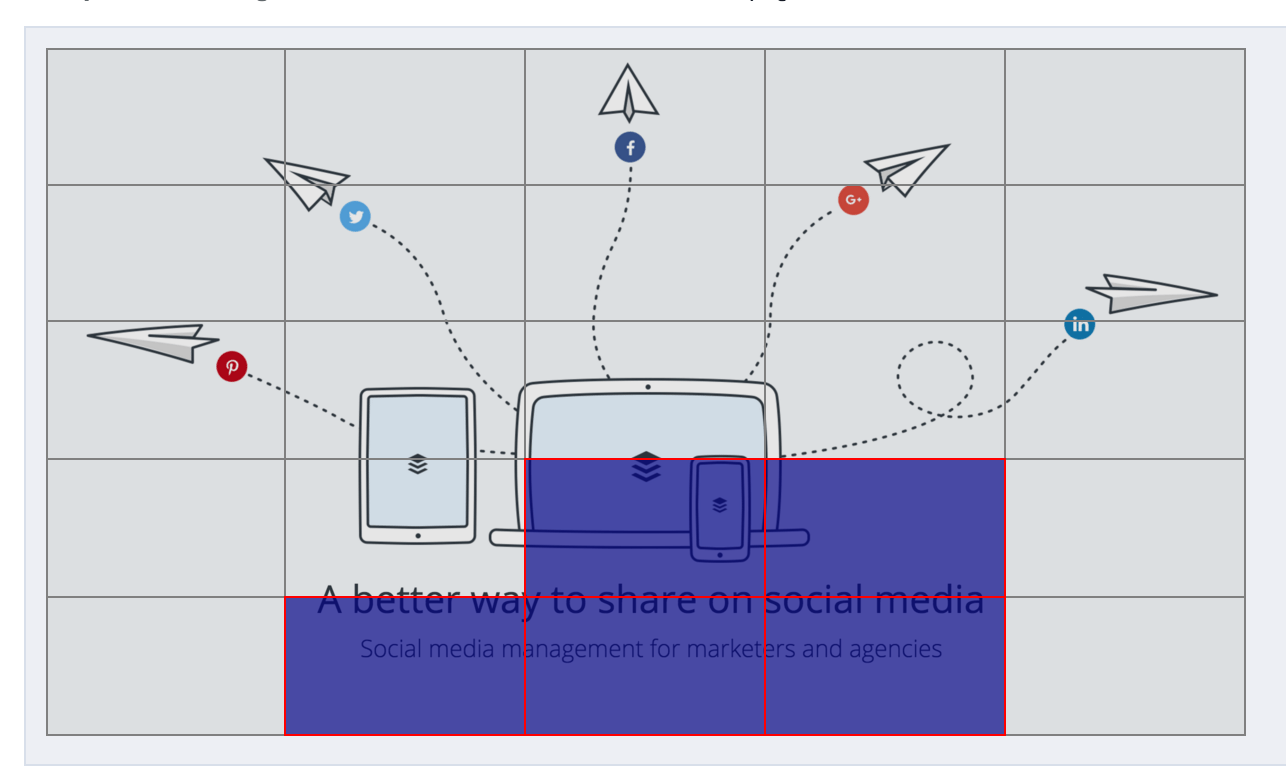
Facebook offers a tool to check the 20% text rule and see if your image meets the guideline. Visit the tool and upload your image. Facebook adds a grid overlay to the image, and you can click any box that includes text. If the boxes you’ve selected make up less than 20% of the image, you’re good to go!
Additionally, you can upload a series of three to seven photos that Facebook will stitch together as a slideshow video. You can select the shape of the slideshow (square or rectangle), the length that the image stays visible, and the transition (none or fade) from one image to the next.
And if you have a video that you’d prefer to use for the page promotion, you can add it here also.
After selecting an image, slideshow, or video, you can customize the text that appears as the update above the ad. Click in the “Text” box to edit. You have an upper limit of 90 characters to use.
From the right-hand panel of the Ad Editor, you can preview your ad and select which locations you want it to appear. By default, Facebook will show the ad on the desktop News Feed, mobile News Feed, and the desktop right column. Click to remove any of these options.
Under “Show Advanced Options,” there are three additional places to customize.
1. Add a headline (this only appears in the desktop right column).
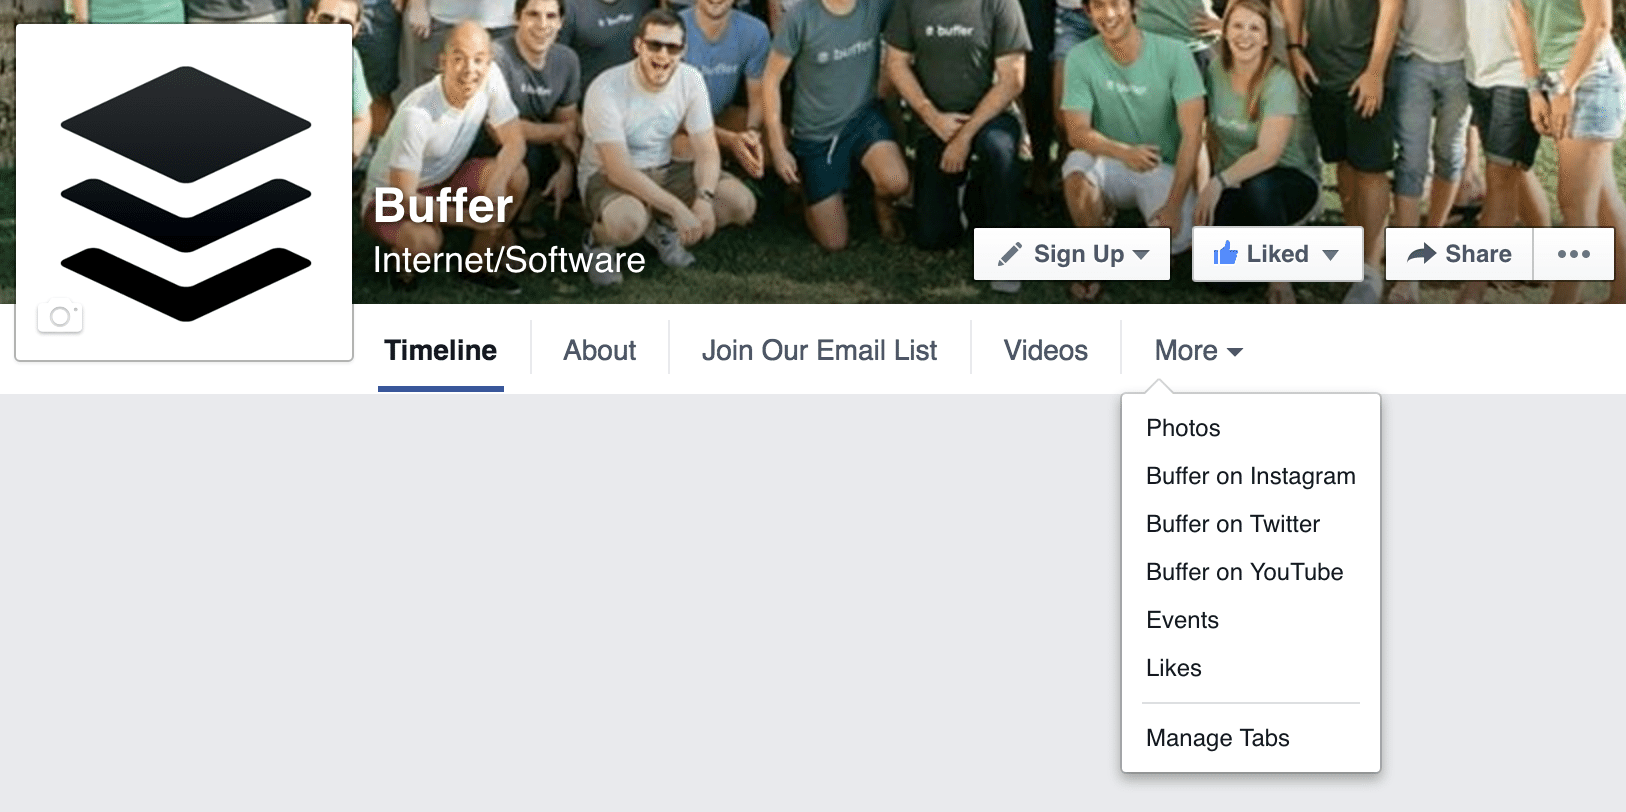
2. Choose where the visitor ends up should they click through to your page. By default, people will arrive at your Timeline. You can also select any other page that you have linked to from your Facebook Page menu, like Video, Photos, Events, or custom pages.
3. You can also track conversions. Conversion tracking with Facebook involves the installation of a conversion pixel, which I’ll cover in a section below. Hop there now if you’re curious.
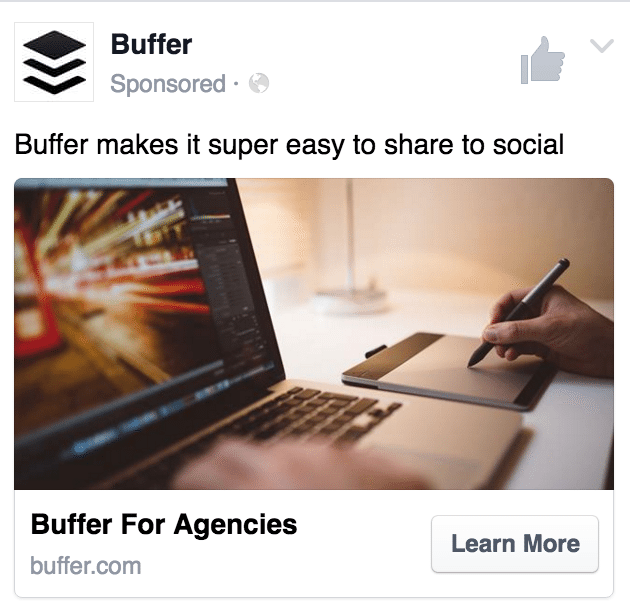
3. Send people to your website
What’s involved:
After you click to create a new ad and choose “Send people to your website,” the next steps are:
- Enter the URL of the page you’d like to promote (e.g., https://buffer.com/agency)
- (Optional) Choose a conversion pixel to further track the performance of the ad (more on pixels here)
- Give this campaign a name
At the next step, you can set your audience and budget. (Jump to the section in this post about audience and budget.)
After setting audience and budget, you get to build the creative. The first customization option for website traffic ads is choosing if you’d like to show a single image or video in the ad or show multiple images in the ad (up to five).
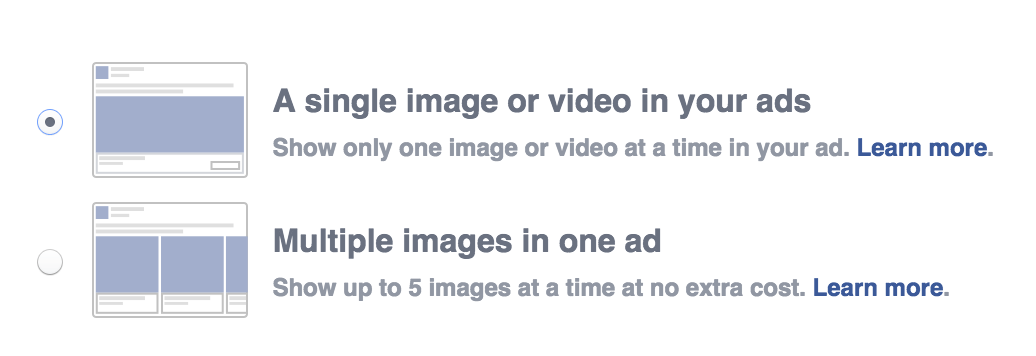
For choosing a single image or video, you’ll see the same image options that you had for the “Promote your Page” ad: single image, slideshow, or video.
For the multiple image option, you get to build a carousel of pictures, each with their own headlines and descriptions.
With multiple images, you’ll have the choice to customize four different aspects of the carousel images:
- Image: Upload a new image or choose one from your library. You can crop the image from within the editor so you get just the right parts showing.
- Headline
- Description (optional)
- Call to Action: Changes to the call-to-action are reflected on all your carousel slides. You can choose among Apply Now, Book Now, Contact Us, Donate Now, Download, Learn More, Shop Now, Sign Up, Watch More, or no button.
(Bonus: You can change the destination URL for each image also, if for instance you might have special landing pages for each unique feature that you’re pitching.)

Additionally, for the multiple image option, you can choose to have Facebook show the best-performing image first (the one that the most people are clicking on), and at the end of your carousel, you can opt for Facebook to add an additional slide with your Page’s profile picture and a call-to-action to “See more at [your website].”
Similar to the previous ad types, with the “Send people to your website” ad, you can choose to show it in the News Feed on desktop and/or mobile and in the right column on desktop. Additionally, you can choose a couple more options:
- Showing your ad on Facebook’s Audience Network, other mobile apps and networks owned by Facebook.
- Showing your ad on Instagram.
Each option comes with previews within the ads editor so you can see your ads in action.
4. Increase conversions on your website
What’s involved:
After you click to create a new ad and choose “Increase conversions,” the next steps are:
- Enter the URL that you’d like to promote
- Important: Choose a conversion pixel to track the conversions of the ad (more on pixels here)
- Give this campaign a name
At the next step, you can set your audience and budget. (Jump to the section in this post about audience and budget.)
After setting audience and budget, you can build the creative for your ad. This works the same way as it does for the “Send people to my website” ad type, mentioned above. You can choose among a single image, a single video, or multiple images. All the same options are present here:
- Connect a Facebook page
- Write a headline that appears under your chosen images/video
- Add description text to go above the images/video
- Choose a call-to-action
- Choose where you’d like the ad to appear: In the News Feed (desktop and/or mobile), on Facebook’s Ad Network, on Instagram, and in the Right Column (desktop only)
5. Get installs of your app
What’s involved:
After you click to create a new ad and choose “Get installs,” the next steps are:
- Choose an app, either by typing in the name of your app or by pasting a URL from the iOS App Store or the Google Play Store. ( You can advertise any app that you’ve registered on Facebook’s developer site.)
- Give this campaign a name
At the next step, you can set your audience and budget. (Jump to the section in this post about audience and budget.)
After setting audience and budget, you can build the creative for you ad. Like other ads, here you’ll have the choice between a single image/video or multiple images. Other customization options will be familiar, too: Headline, text, Facebook page, etc.
For this ad type in particular, there are just a handful of differences.
1. Ad Preview: App install ads only appear on mobile apps and websites.
2. Deep links: You can link directly to a particular screen or state within your app. For instance, if you have a URL that points to a specific product page or account page within the app, you can link directly there.
3. Call to Action buttons: There are a few additional, specific app CTAs that you can choose from. Here’s the full list:
- Book Now
- Download
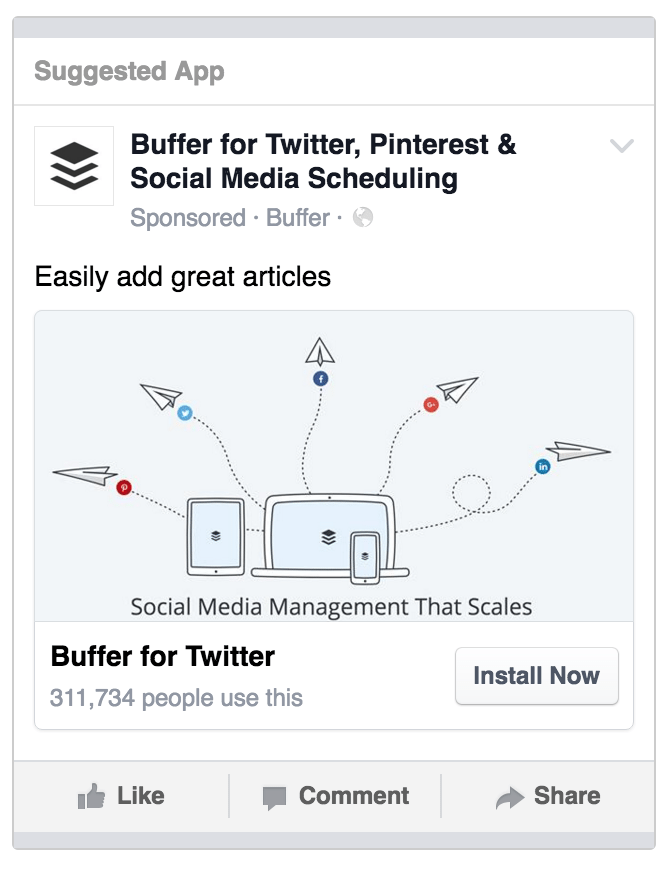
- Install Now (default)
- Learn More
- Listen Now
- Play Game
- Shop Now
- Sign Up
- Use App
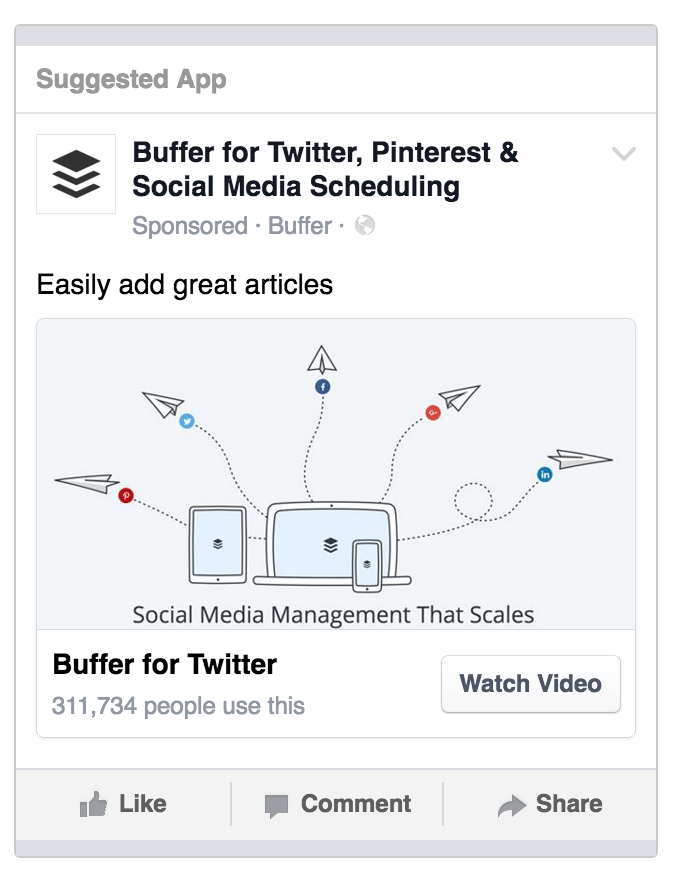
- Watch More
- Watch Video
4. Add conversion tracking. More here.
6. Increase engagement in your app
What’s involved:
After you click to create a new ad and choose “Increase engagement,” the next steps are:
- Choose an app, either by typing in the name of your app or by pasting a URL from the iOS App Store or the Google Play Store.
- Give this campaign a name
At the next step, you can set your audience and budget. (Jump to the section in this post about audience and budget.)
After setting audience and budget, you can build the ad’s creative elements. For the “Increase app engagement” ad type, the settings here are the exact same as they are for the “Get app installs” ad type. The main difference between the two is in the destination and goal for each. For app installs, you’ll typically be interested in gaining more point-of-entry signups, linking to the installation page for your app.
With the “Increase app engagement” ad type, you’ll likely be interested in Facebook’s Deep Links settings, where you can link to specific places within the app and drive more engagement there. For instance, at Buffer, we might advertise to current app users and include a link for them to view the posts in their queue (and link directly there).
7. Reach people near your business
What’s involved:
After you click to create a new ad and choose “Reach people near you,” the next steps are:
- Choose one of your Facebook Pages or enter its URL
- Give this campaign a name
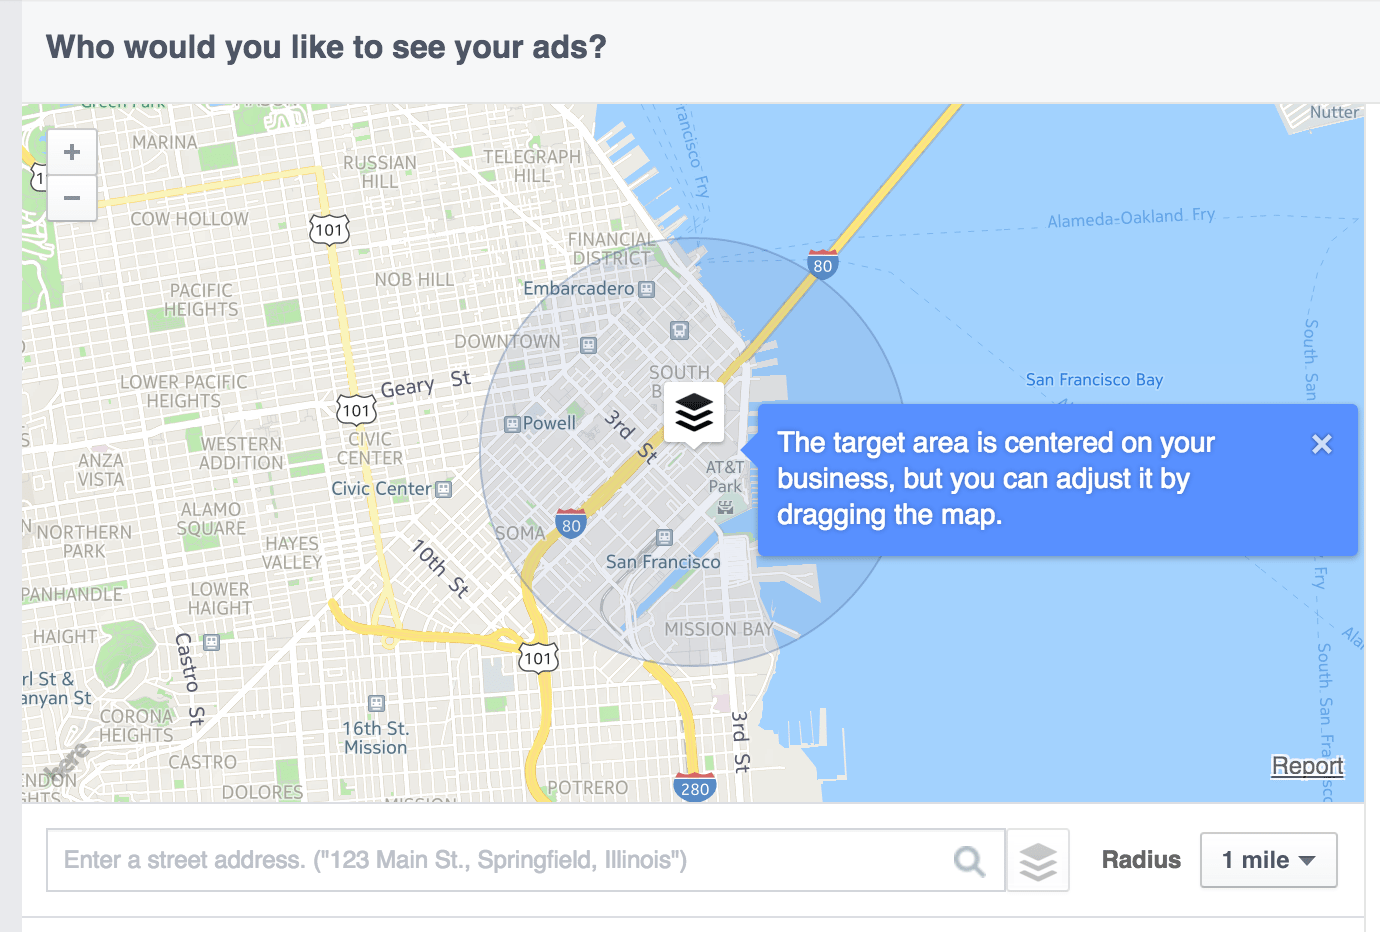
At the next step, you can set your audience and budget. Unlike all other Facebook ad types here, the Audience settings for “Reach people near you” will ask you to choose an area from a map and then target the ad toward people in those areas.
By default, the map will center on your business’s street address. You can enter any address you’d like in the text box below the map and set the Radius to any of 8 defaults (from 1 mile to 50 miles) or a custom mile radius.
Once the map is in place, you can also click to move the target area to a different point in the map.
(For more info and tips these settings, jump to the section in this post about audience and budget.)
After setting audience and budget, you can create the ad itself. These localization ads have four different opportunities to gain engagement for your business:
- Like Page
- Call Now
- Learn More
- Send Message
For the “Like Page” option, the ad will be geared toward driving Page likes. You can change the images, the main text, the headline, and the link description for this ad.
For “Call Now”, you can make the same changes as with the “Like Page” campaign, plus you can also include your phone number.
For “Learn More,” when people click the Learn More button, they’ll be taken to any URL you choose. All the same customization options appear here (images, text, headlines) plus an additional box for the URL of your choosing.
For “Send Message,” when people click the Send Message button, they’ll have the chance to send you a message through your Facebook page.
8. Raise attendance at your event
What’s involved:
After you click to create a new ad and choose “Raise attendance,” the next steps are:
- Choose one of your Facebook events or enter a Facebook event URL
- Give this campaign a name
At the next step, you can set your audience and budget. The ad’s audience will default to a segment near the location of your event.
(Jump to the section in this post about audience and budget.)
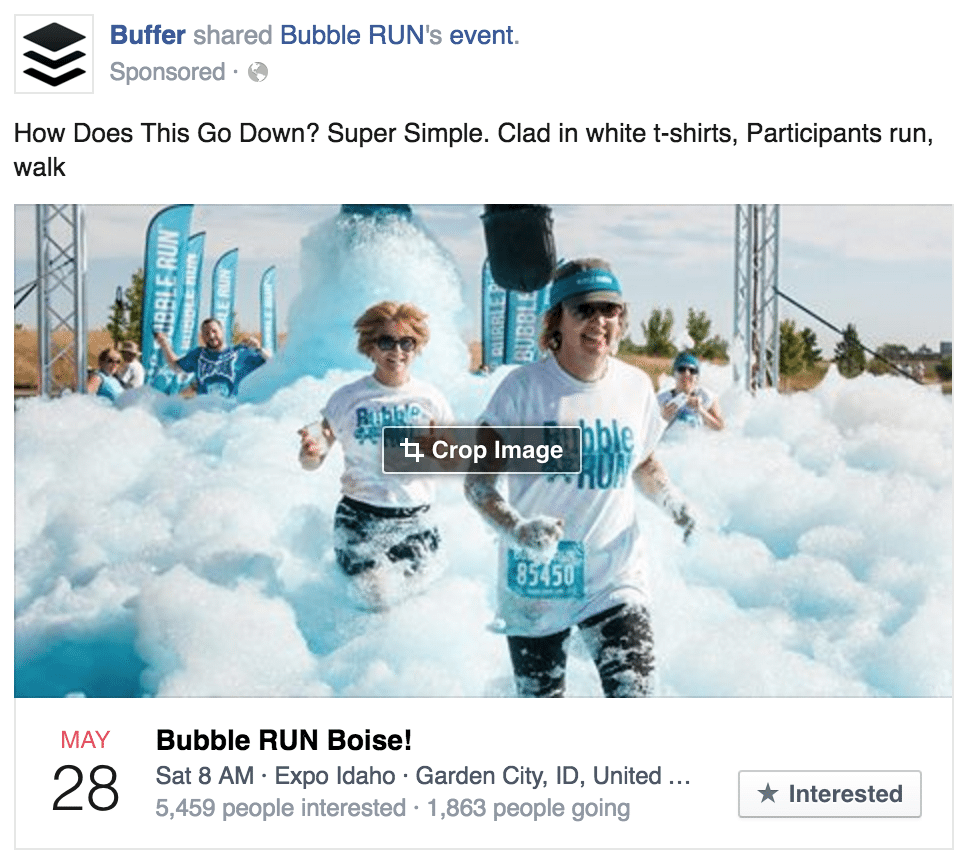
After setting audience and budget, you can create the ad itself. Facebook will grab the main image for the event automatically and suggest it as an image to use in the ad. Like other ad types, you can create up to six ads to test by uploading multiple images. There’s always just the one image per ad.
Most of the rest of the ad is taken care of for you. Facebook automatically includes the date, the time, the event’s title, the location, and the number of people interested and attending. The call-to-action button on the desktop News Feed is “Interested.”
You can see an ad preview above for the specific layout of these elements.
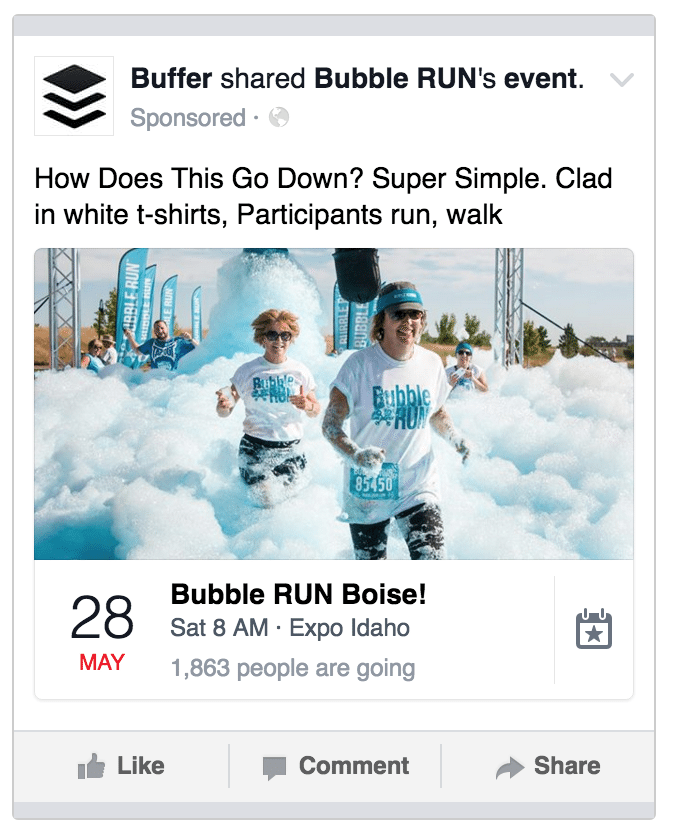
Things vary slightly for mobile …
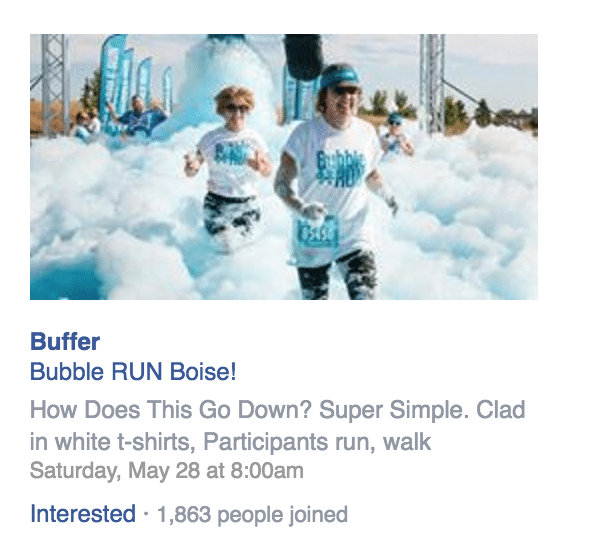
… and for the desktop right column.
For additional customization, you can change the text that appears as the update above the ad. You can also ad custom URL tags and conversion pixel tracking.
9. Get people to claim your offer
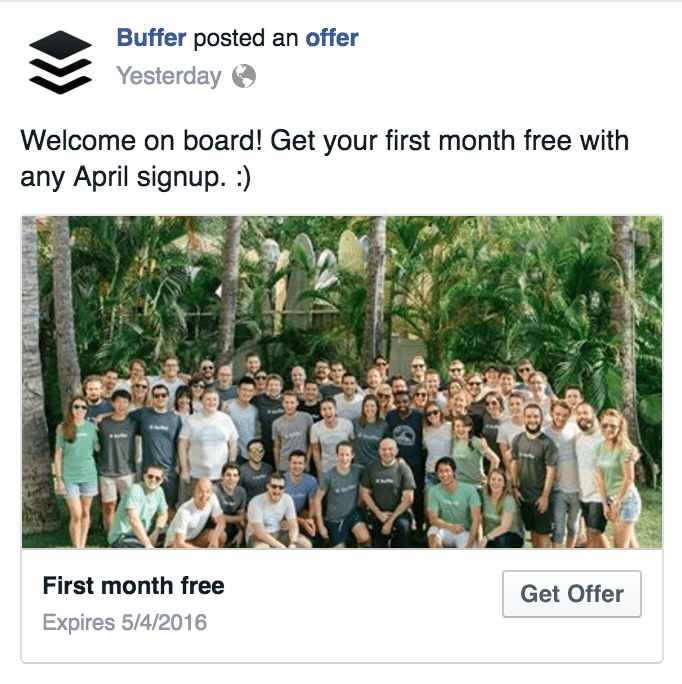
What’s involved:
After you click to create a new ad and choose “Get people to claim your offer,” the next steps are:
- Choose one of the offers you’ve published to your Facebook Page or create a new offer
- Give this campaign a name
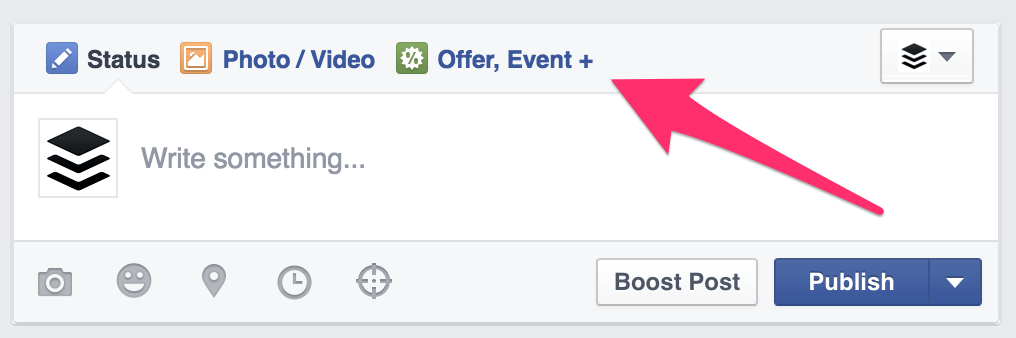
For creating an offer, you can do this directly from the ad editor itself, or you can create offers from your Facebook Page directly. If you’re on your Facebook Page, click on the “Offer” link just above the text editor:
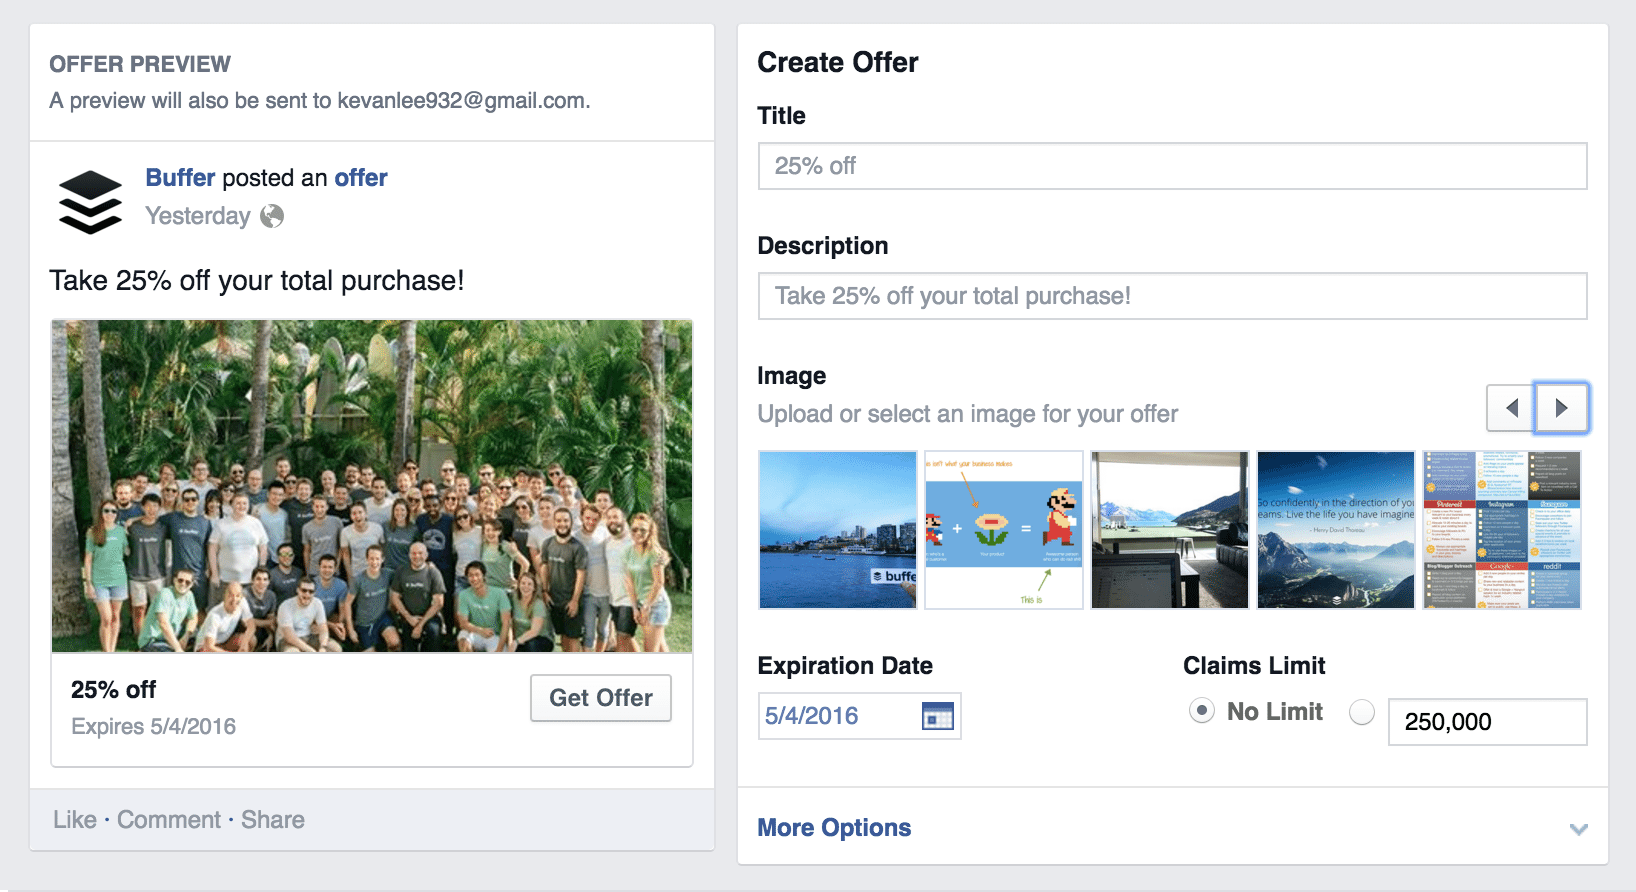
For the offer, you can call it out directly in the headline and text, then link to a landing page or include a promo code. In addition, you can set the dates of the offer as well as a limit to the number of people who take advantage.
Once you’ve created/chosen an offer to boost, you can set your audience and budget. (Jump to the section in this post about audience and budget.)
After setting audience and budget, you can preview how the ad will look in the desktop/mobile News Feed and the desktop right column. There aren’t really any customization options here, other than adding URL tags and conversion pixels. Much like a boosted post, this one will go out looking near identical to the original offer post.
10. Get video views
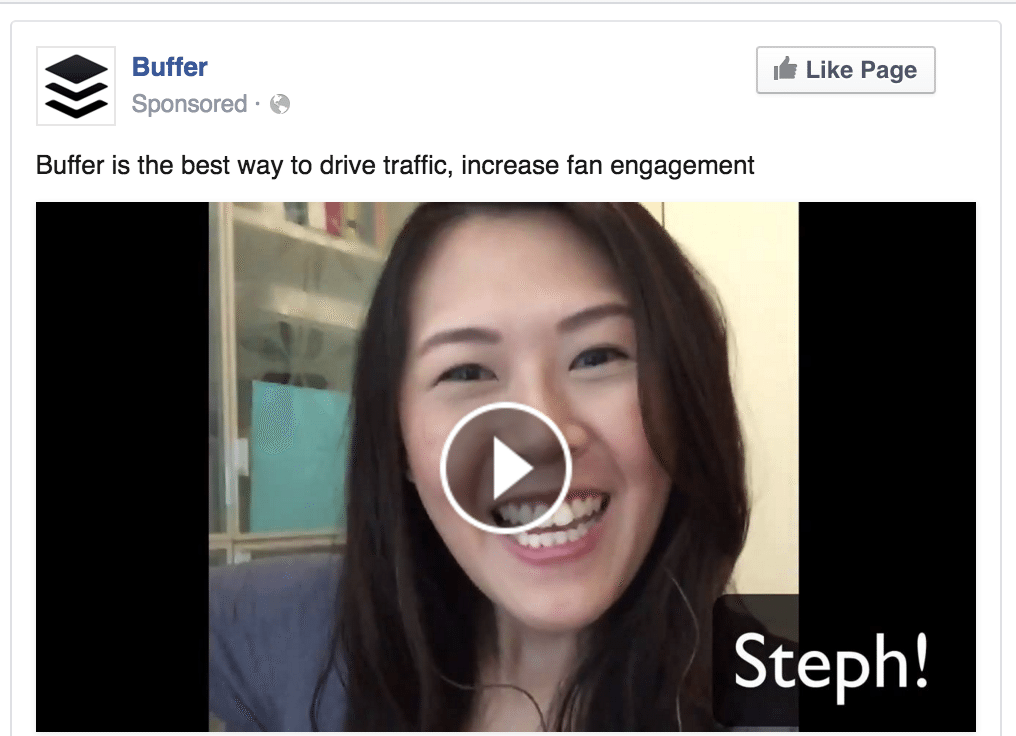
What’s involved:
After you click to create a new ad and choose “Get video views,” the next steps are:
- Choose one of your Facebook Pages or enter its URL
- Give this campaign a name
At the next step, you can set your audience and budget. (Jump to the section in this post about audience and budget.)
After setting audience and budget, you can create the ad. First, you’ll want to upload a video to share. You can also pull from a post on your page that has included a video. When uploading a video, Facebook recommends the following:
- .mov or .mp4 file format
- At least 720p resolution
- Widescreen (16:9 aspect ratio) is recommended
- 120 minutes and/or 2.3 GB max for Facebook
- 60 seconds and/or 2.3 GB max for Instagram
Alternately, you can use a series of 3 to 7 images as a slideshow, which will autoplay as a video in the News Feed.
After the video’s been selected, you can edit the way the ad appears by customizing the text and buttons. By default, Facebook does not show a button, allowing the ad to focus on purely gaining more video views. You can edit the text that appears above the video.
If you’d like to include a button with the ad, there are seven choices from the “Call to Action” dropdown:
- No button (default)
- Book Now
- Download
- Learn More
- Shop Now
- Sign Up
- Watch More
For each of these button options, you can customize four additional text fields: the website URL, the display URL, the headline, and the link description.
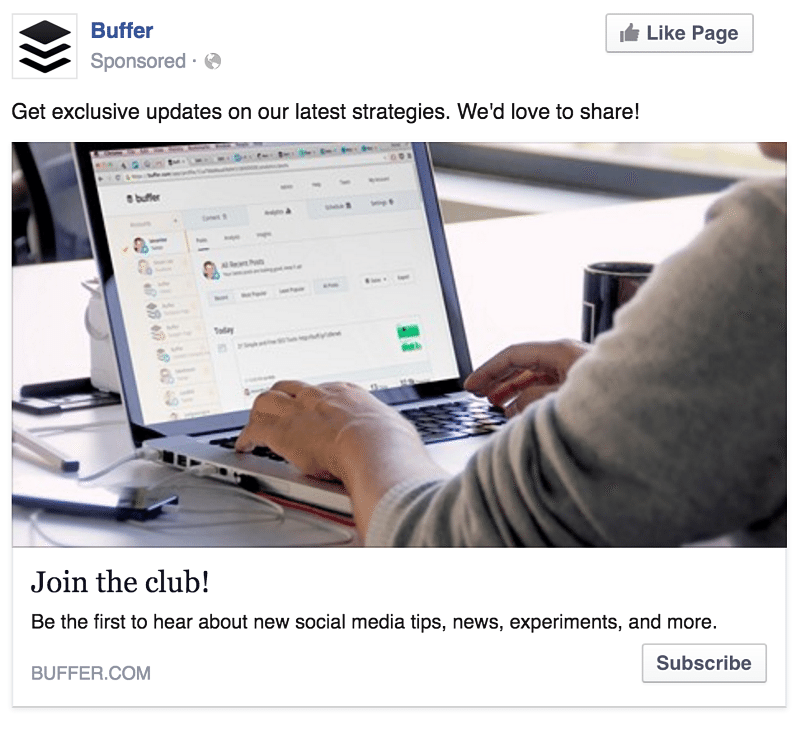
11. Collect leads for your business
What’s involved:
After you click to create a new ad and choose “Boost your posts,” the next steps are:
- Choose one of your Facebook Pages or enter its URL
- Give this campaign a name
At the next step, you can set your audience and budget. (Jump to the section in this post about audience and budget.)
After setting audience and budget, you’ll go to the ad creative. Building the ad will be the same as it is for most other campaigns. You can customize the image and the text that appears in all places on the ad.
Looking for some advanced Facebook Lead Ad strategies? We teamed up with the folks at HubSpot to bring you a complete marketer’s guide on Facebook Lead Ads!
Where the Facebook lead ad distinguishes itself is with its Lead Form. In the ad itself, there are options for six different buttons:
- Apply Now
- Download
- Get Quote
- Learn More
- Sign Up
- Subscribe
Each of these buttons will link to a form that you can create within the Facebook ad editor.
Below the customization section is the Lead Form section, and in here you can choose to attach an existing Lead Form that you’ve previously created or create a new one.
Here are the steps to create a new Facebook Lead Form:
- Give the form a name and choose the primary language.
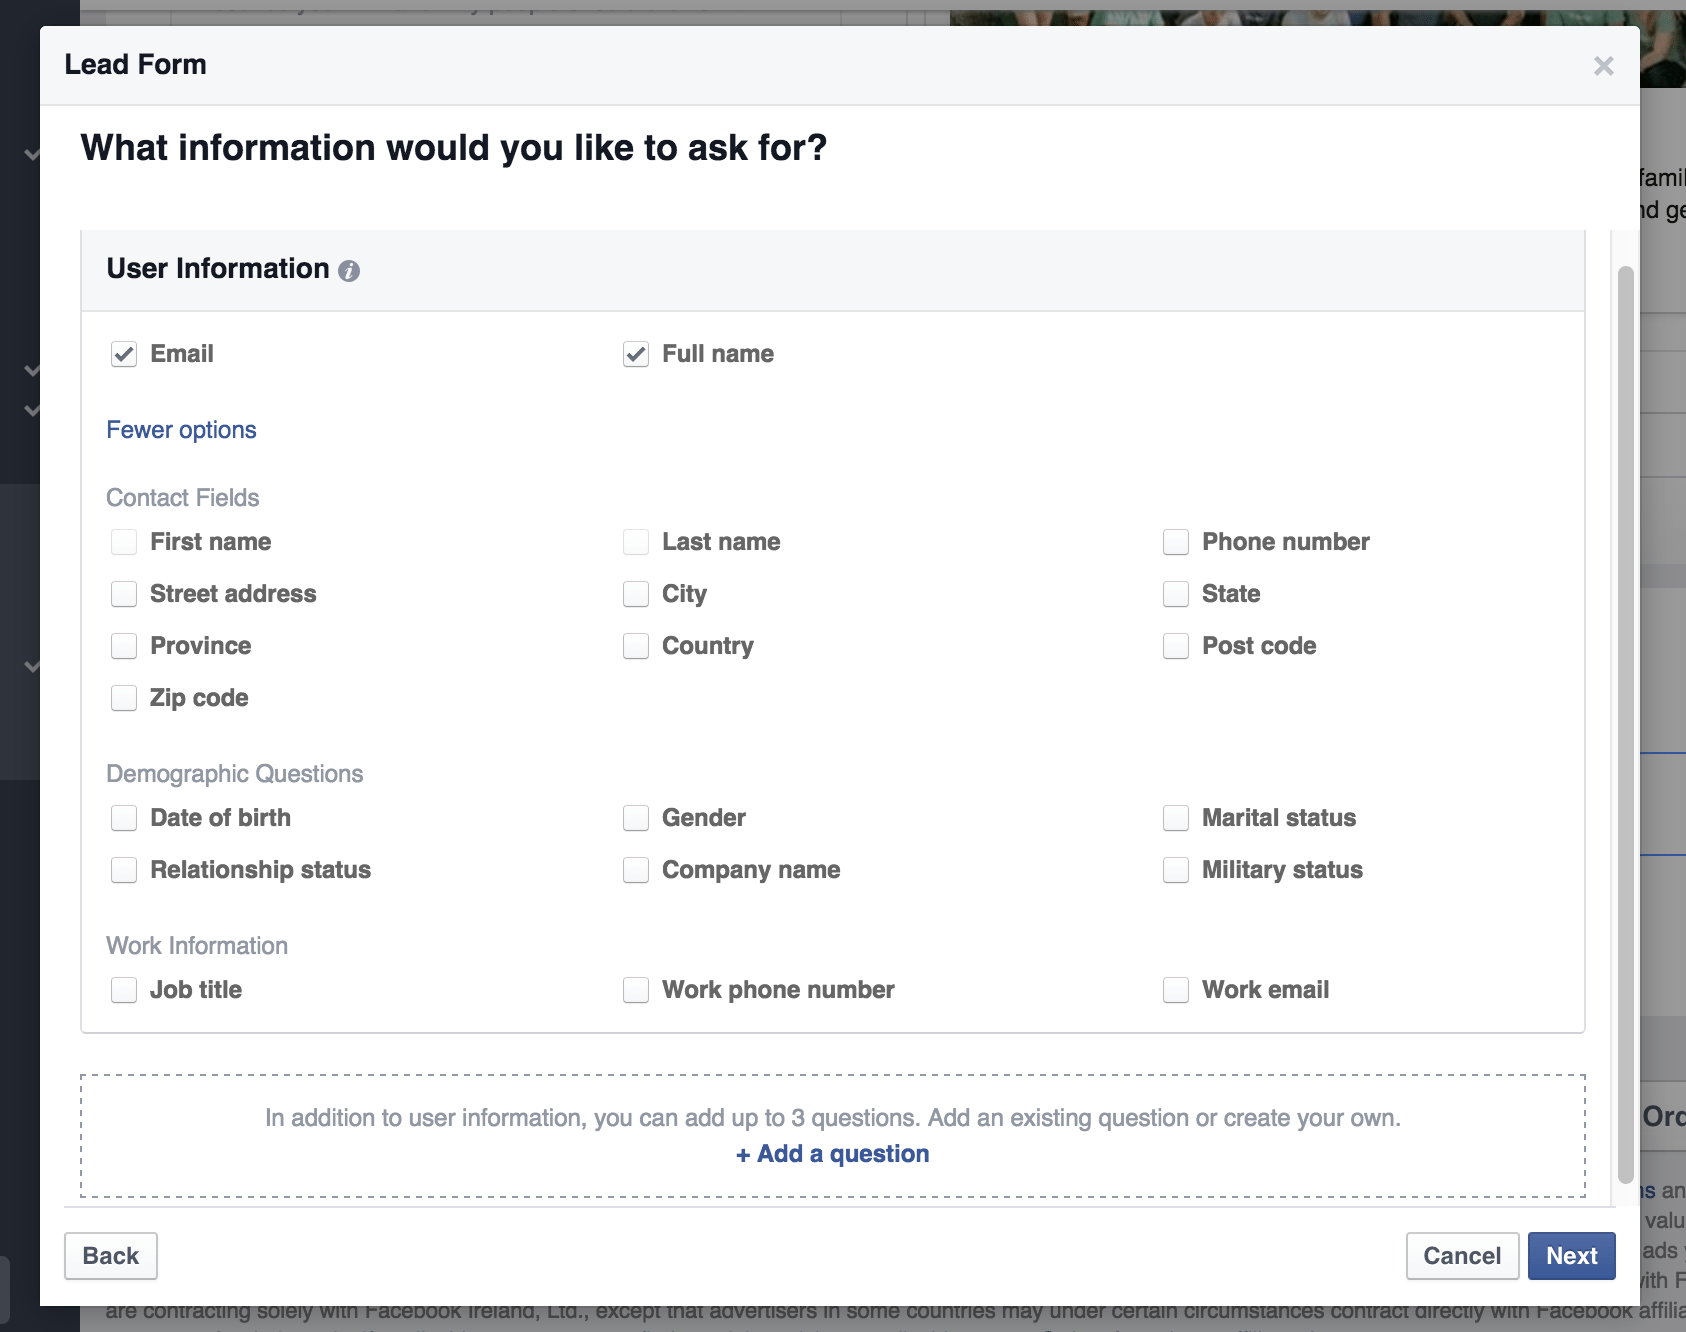
Select which information you’d like to receive.
By default, Facebook will suggest the email and full name of the person. You can click below these two options to expand the listing to include 19 more options (admittedly, some of them more useful than others).
- First name
- Last name
- Phone number
- Street address
- City
- State
- Province
- Country
- Post code
- Zip code
- Date of birth
- Gender
- Marital status
- Relationship status
- Company name
- Military status
- Job title
- Work phone number
- Work email
You can also ask three custom questions in addition to the options above. Facebook suggests particular info you might wish for here, or you can type a fully custom question of your own choosing. The preset suggestions include things like buyer intent (“When do you plan to make a purchase?”) to car details (“Choose a car model.”). The open-ended question can be whatever you’d like.
You can customize the answers for each question, or leave it open-ended as well.
After settling on your questions and information, you’ll then be asked for a link to the privacy policy of your website and any legal disclaimers.
And (final step) you can include a link to your website for people to visit upon completing the Lead Form.
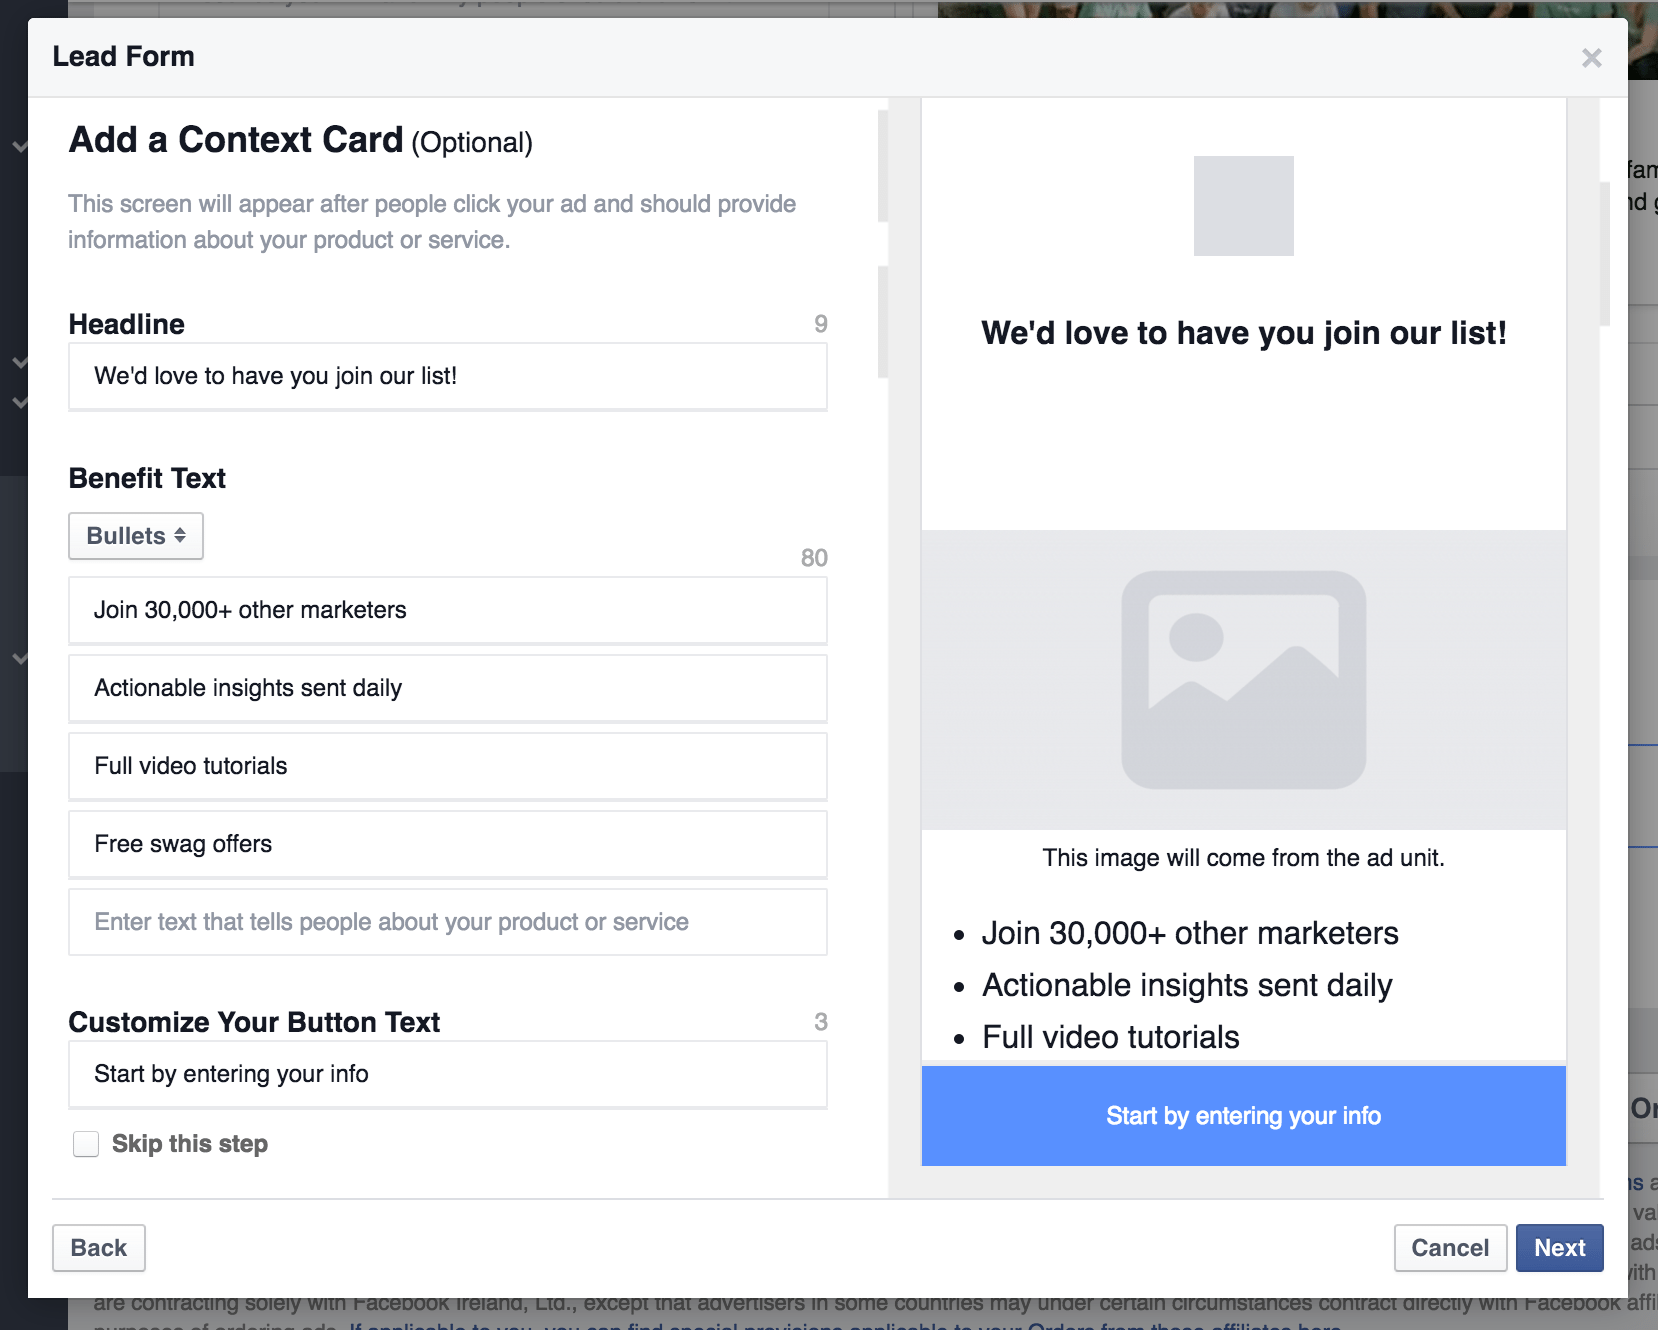
Optional: Context Cards
Additionally, before someone fills out a Lead Form, you can show a Context Card, which adds a bit more detail about the offer or next steps. With this card, you can edit:
- The headline
- The benefit text (either a paragraph or bullet list)
- The button text
The context card works great for explaining the benefits of what you’re offering!
After settling on all these details, you’ll get a chance to preview the flow of your form and then confirm and save. You can now use this form from any Lead Ad you create moving forward.
How to choose an audience for your Facebook ad
— Jump to the section on audience strategies —
In each ad set, you’ll have the chance to target a specific audience with your ad, and this is where Facebook advertising can become truly powerful and significant. There is lots to understand about how these audience segments work, and there’re plenty of strategies to try, too. Here’s a quick overview of how and what to do with choosing a Facebook ad audience.
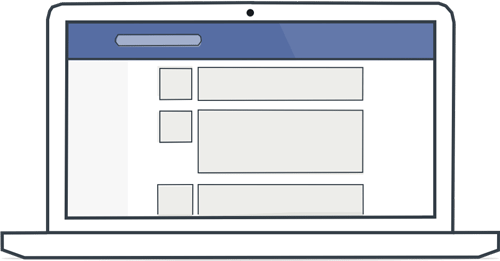
Finding your way around the audience settings
The audience settings tab will be the second screen you see after choosing your Facebook ad type. And there’s a lot to see here! This is a quick overview of the Facebook ads audience settings:
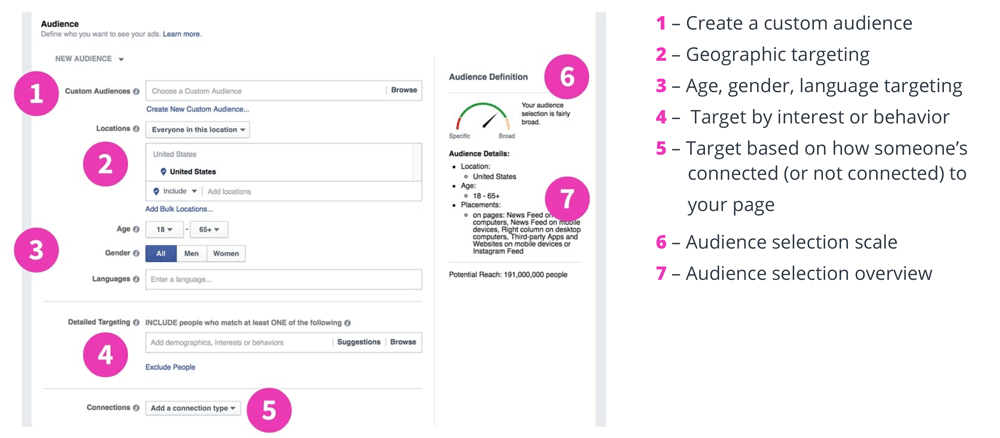
1 – Create a custom audience (more here)
2 – Geographic targeting
3 – Age, gender, language targeting
4 – Target by interest or behavior
5 – Target based on how someone’s connected (or not connected) to your page
6 – Audience selection scale
7 – Audience selection overview
About targeting
As you can tell from the layout of the audience settings, the majority of options here have to do with audience targeting. You get to choose precisely who sees your ad, based on hundreds (even thousands) of different factors. Like:
- Location
- Age
- Gender
- Language
- Interests
- Behaviors
- Connections
Here’s a bit more about each:
Location
Location segmentation allows you to include or exclude people who will see your ad, based on where they are in the world. Like most Facebook ad settings, the location info is quite robust.
Start by choosing how you want to define that a person is in a particular area:
- Target “Everyone in this location” to reach everyone whose home or most recent location is in the area
- Target “People who live in this location” to reach everyone whose home is in the area
- Target “People recently in this location” to reach people whose most recent location is in the area
- Target “People traveling in this location” to reach people whose most recent location is in the area but whose home is at least 125 miles away
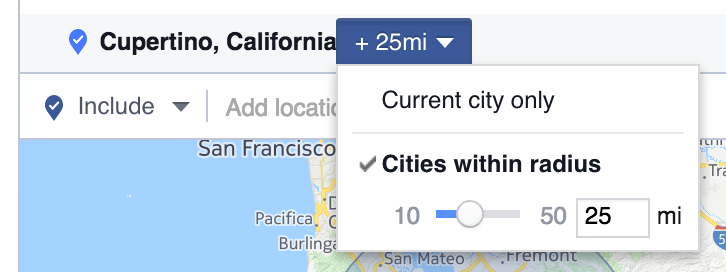
Then you can add an exact location by typing in the name of a country, state, region, city, postal code, address — even a Nielsen TV region or congressional district.
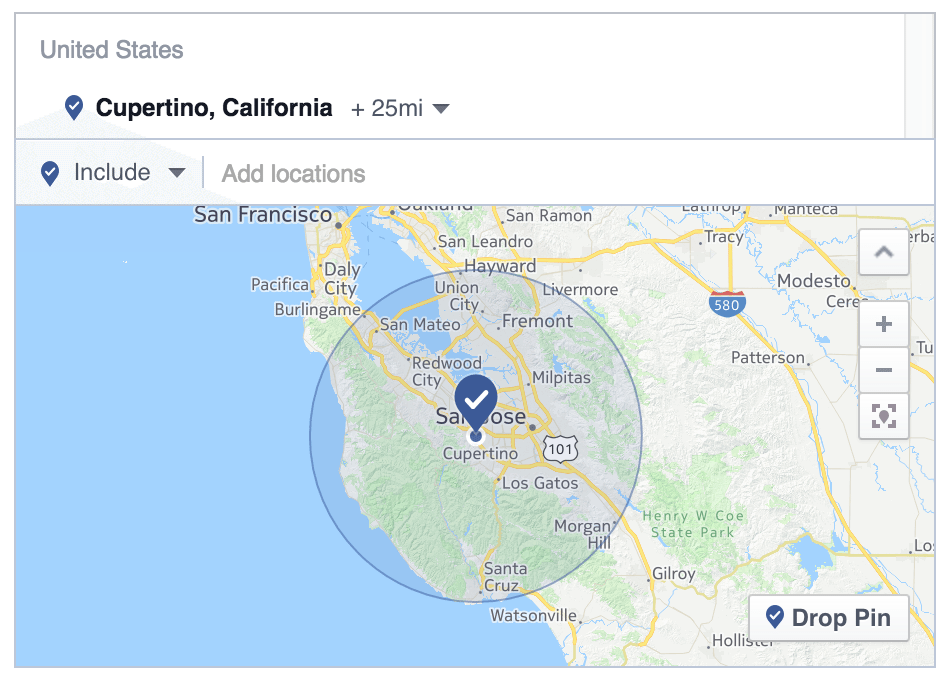
Once you’ve entered a location, you can fine tune the radius that you’ll use to target. By clicking the “+25mi” text next to the city name, you’ll get a drop-down that allows you to pick just how wide you’d like to target: everything from just the exact city itself to 10 miles up to 50 miles.
You can add as many locations as you’d like by repeating the steps above. Also, if you have a big list of locations to add, you can do it in bulk by pasting in from a spreadsheet or text file.
Age, Gender, and Language
These are likely to be pretty self-explanatory. For age, you can choose a minimum and maximum age, and the ad will be served only to those who fall within the range. Same goes for gender, where the options are “All” (default), “Men,” or “Women.”
For language, you can leave this one blank unless the audience you’re targeting speaks a different language than what you’d typically find in the locations you’ve chosen.
Interests and Behaviors
This is perhaps the most detailed section of options you’ll find anywhere within Facebook ads. You can get really, really granular with the specific type of people you want to target with an ad. Facebook splits this section into three categories (a fourth category is for advanced segments you’ve requested):
Demographics, which contain things like …
- Education level
- Job titles
- Relationship status
- Income level
Interests, which contain things like …
- Fitness
- Shopping
- Sports
- Business
Behaviors, which contain things like …
- B2B company size
- Operating systems used
- Purchase behavior
- Recent homeowners
Like with other ad settings, you have the choice with these options to either include or exclude based on factors of demographics, interests, and behaviors. The default option here is to include anyone who matches any of the segments. To further narrow the audience, you can add a segment that all potential audience members need to meet.
Connections
Last, you can choose to segment based on how a person has (or hasn’t) interacted with your Facebook page, app, or event before. This can be a necessary segmentation feature, particularly if you’re trying to track down an audience that might not be familiar with you, or to followup with an audience that already has context with what you do.
Here are the options for each.
Facebook pages
- People who like your page
- Friends of people who like your page
- Exclude people who like your page
Apps
- People who used your app
- Friends of people who use your app
- Exclude people who use your app
Events
- People who responded to your event
- Friends of people who responded to your event
- Exclude people who already responded to your event
— Jump to the section on audience strategies —
About custom audiences
This is really neat stuff: A custom audience is a group of people who have a previous relationship with you, perhaps as customers or contacts. You can build an audience of just these particular people and serve your ads directly to them.
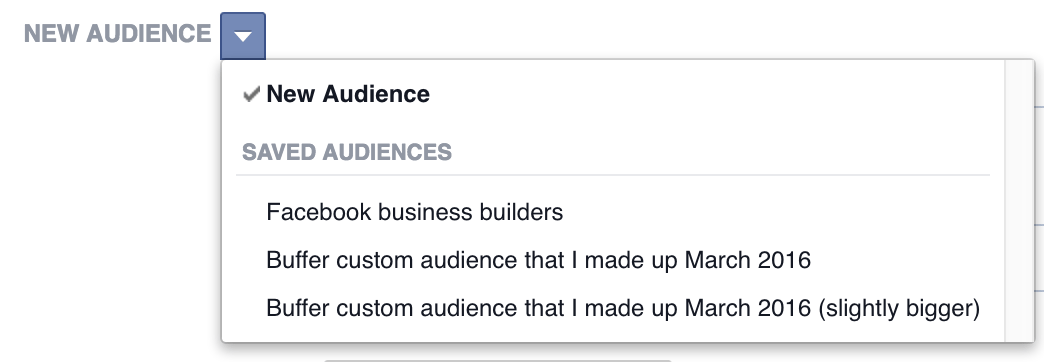
To get started, click the “Create new custom audience” link at the top of the audience settings page. Your previously created custom audiences appear just above, and you can select those for future campaigns.
A popup will appear with three different ways to create your audience: Customer List, Website Traffic, or App Activity.
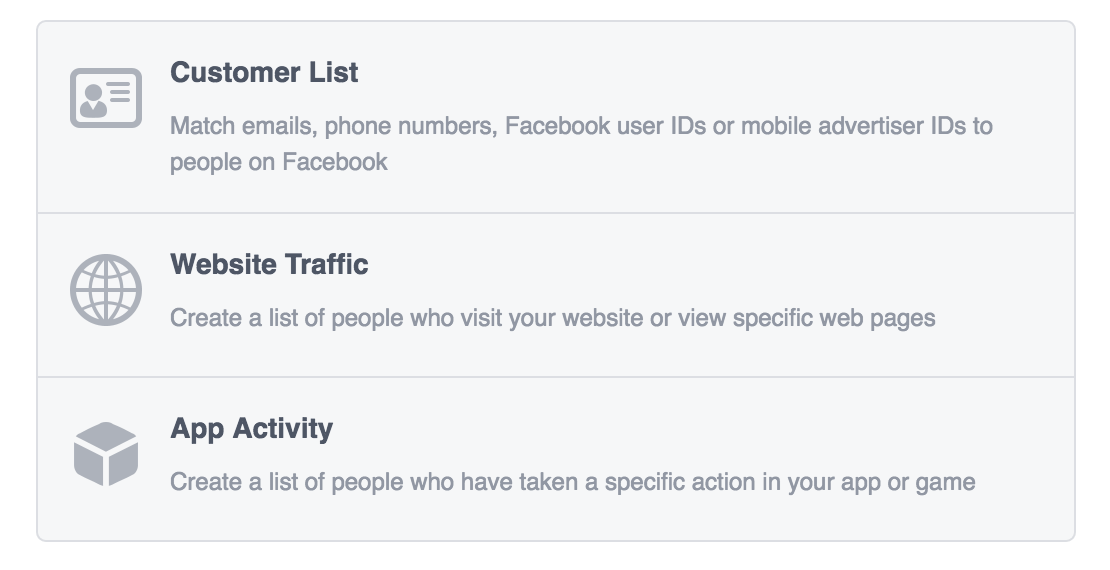
With the Customer List, you can upload or copy/paste a data file of email addresses, phone numbers, or Facebook user IDs.
Facebook also integrates directly with MailChimp so you can pull from your existing MailChimp lists to create a custom audience.
With the Website Traffic, Facebook can create an audience based on the conversion pixel you’ve installed on your site. Here, you have the options to choose a timeframe for the traffic as well as segment by:
- Anyone who visits your site
- People who have seen particular pages
- People who have seen particular pages but not other pages
- People who haven’t visited for awhile
With the App Activity, you select one of your connected Facebook apps and segment based on activity within the app.
Custom audiences help to further refine the pool from which you can segment. For instance, once you select or create a custom audience, you can then go ahead and continue to filter that audience based on location, demographics, interests, and behaviors.
— Jump to the section on audience strategies —
Once you’ve created an audience, you can save it for quick use next time. Check the box at the bottom of the audience settings to name and save this particular audience. The next time you create an ad, you can choose an existing audience at the top of the settings.
Budgeting, Analysis, and Successful Strategies
How to set a budget for your Facebook ad
— Jump to the section on budget strategies —
In the budget settings for your Facebook ad, you’ll get to control a couple of important elements: How much you want to spend and when you want to start spending it. There are further, specific customization options at this stage, too, for those eager to have even more control over the specifics of delivery.
Choosing a budget
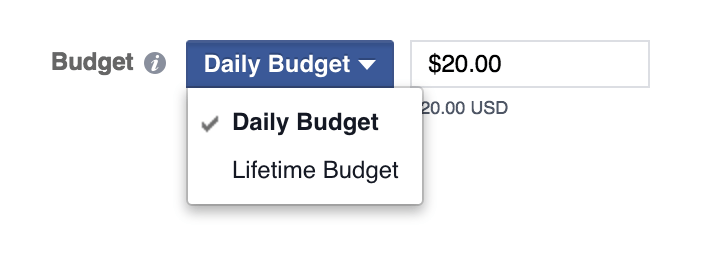
By default, Facebook starts out suggesting a $20.00 daily budget. You can adjust this however you want, choosing either “daily” or “lifetime” budget and also editing the amount you’re wanting to spend.
With the daily budget, the amount you set is the maximum you will spend on any given day.
With the lifetime budget, the amount you set is the maximum you will spend on the lifetime of your ad.
When you choose a lifetime budget, you will also need to set a start and end date for your ad. The option to run the ad continuously is no longer available.
Choosing a schedule
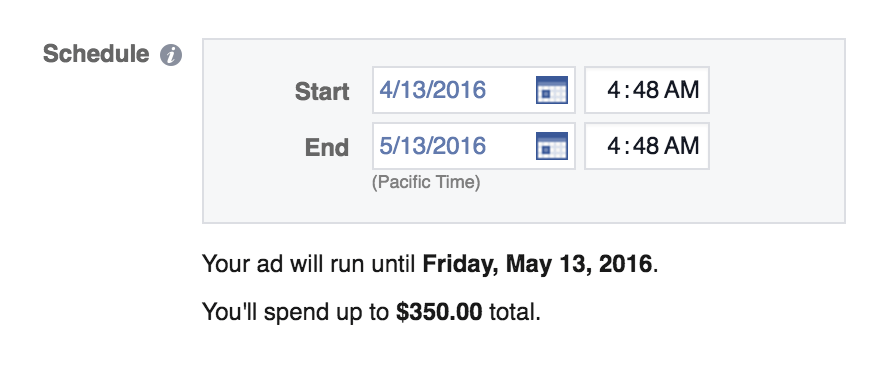
For daily and lifetime ads, you can tell Facebook when specifically you’d like the ad to run. By default, if you are running a daily ads budget, Facebook suggests to run the ad continuously. Otherwise, you can choose to start and end the ad on a specific day. (Facebook runs the math here for you and tells you the maximum amount, total, you will spend.)
— Jump to the section on budget strategies —
Understanding the Facebook Ads data (how to tell when your ad is working)
Facebook offers a generous amount of data and analysis for every ad campaign. It’s all available from the dashboard menus and categorized into a series of tiered sets. The structure looks like this:
> Campaigns – The very high-level campaign (e.g., “Get more clicks to our website. Woot!”)
>> Ad Sets – A collection of ads that support the main campaign (e.g., “Week 3 ads”)
>>> Ads – The specific ads that you’re running, with media and text and all that
In theory, you might have 1 campaign with 5 different ad sets and 10 different ads in each ad set. Numbers get bigger the more levels you go down.
To see an overview of stats from any of these categories, you can quickly toggle back and forth from your main ads dashboard (http://facebook.com/ads/manage)
You can click on any individual campaign, ad set, or ad to see just the stats for that particular look. To see multiple ones at once, click the checkbox next to each and then select View.
All data can be sorted by clicking on the heading for each column, and the data can be exported by clicking the Export button in the top right corner above the data table.
The stats for each have a robust set of data based on performance, delivery, cost, relevance, and more. You can toggle between these different looks by clicking through to campaigns, ad sets, and ads or by switching the view from the drop-down boxes above the right-side of the stats table.
For campaigns, by default, you see these stats:
- Delivery – “Is the ad running now or not?”
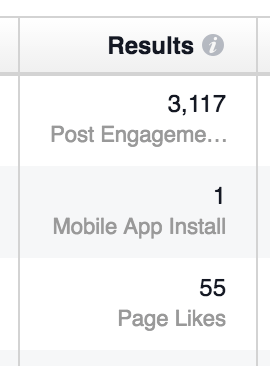
- Results – “How many actions has this campaign received?” i.e., clicks, installs, likes, and more. Facebook tells you which specific actions are assigned to the campaign.
- Reach – “How many people saw my campaign?”
- Cost – “How much did I pay, on average, for each action?”
- Amount spent – “How much have I spent so far on this campaign?”
- End date – “When does this campaign end?”
For ad sets, by default, you see these stats:
- Delivery – “Are these ads running? How many?”
- Reach – “How many people have seen ads from this set?”
- Cost – “How much did I pay, on average, for each action?”
- Budget – “What’s the maximum I’m going to pay on this ad set? Daily or lifetime?”
- Amount Spent – “How much have I spent so far?”
- Schedule – “How long will this ad set be running?”
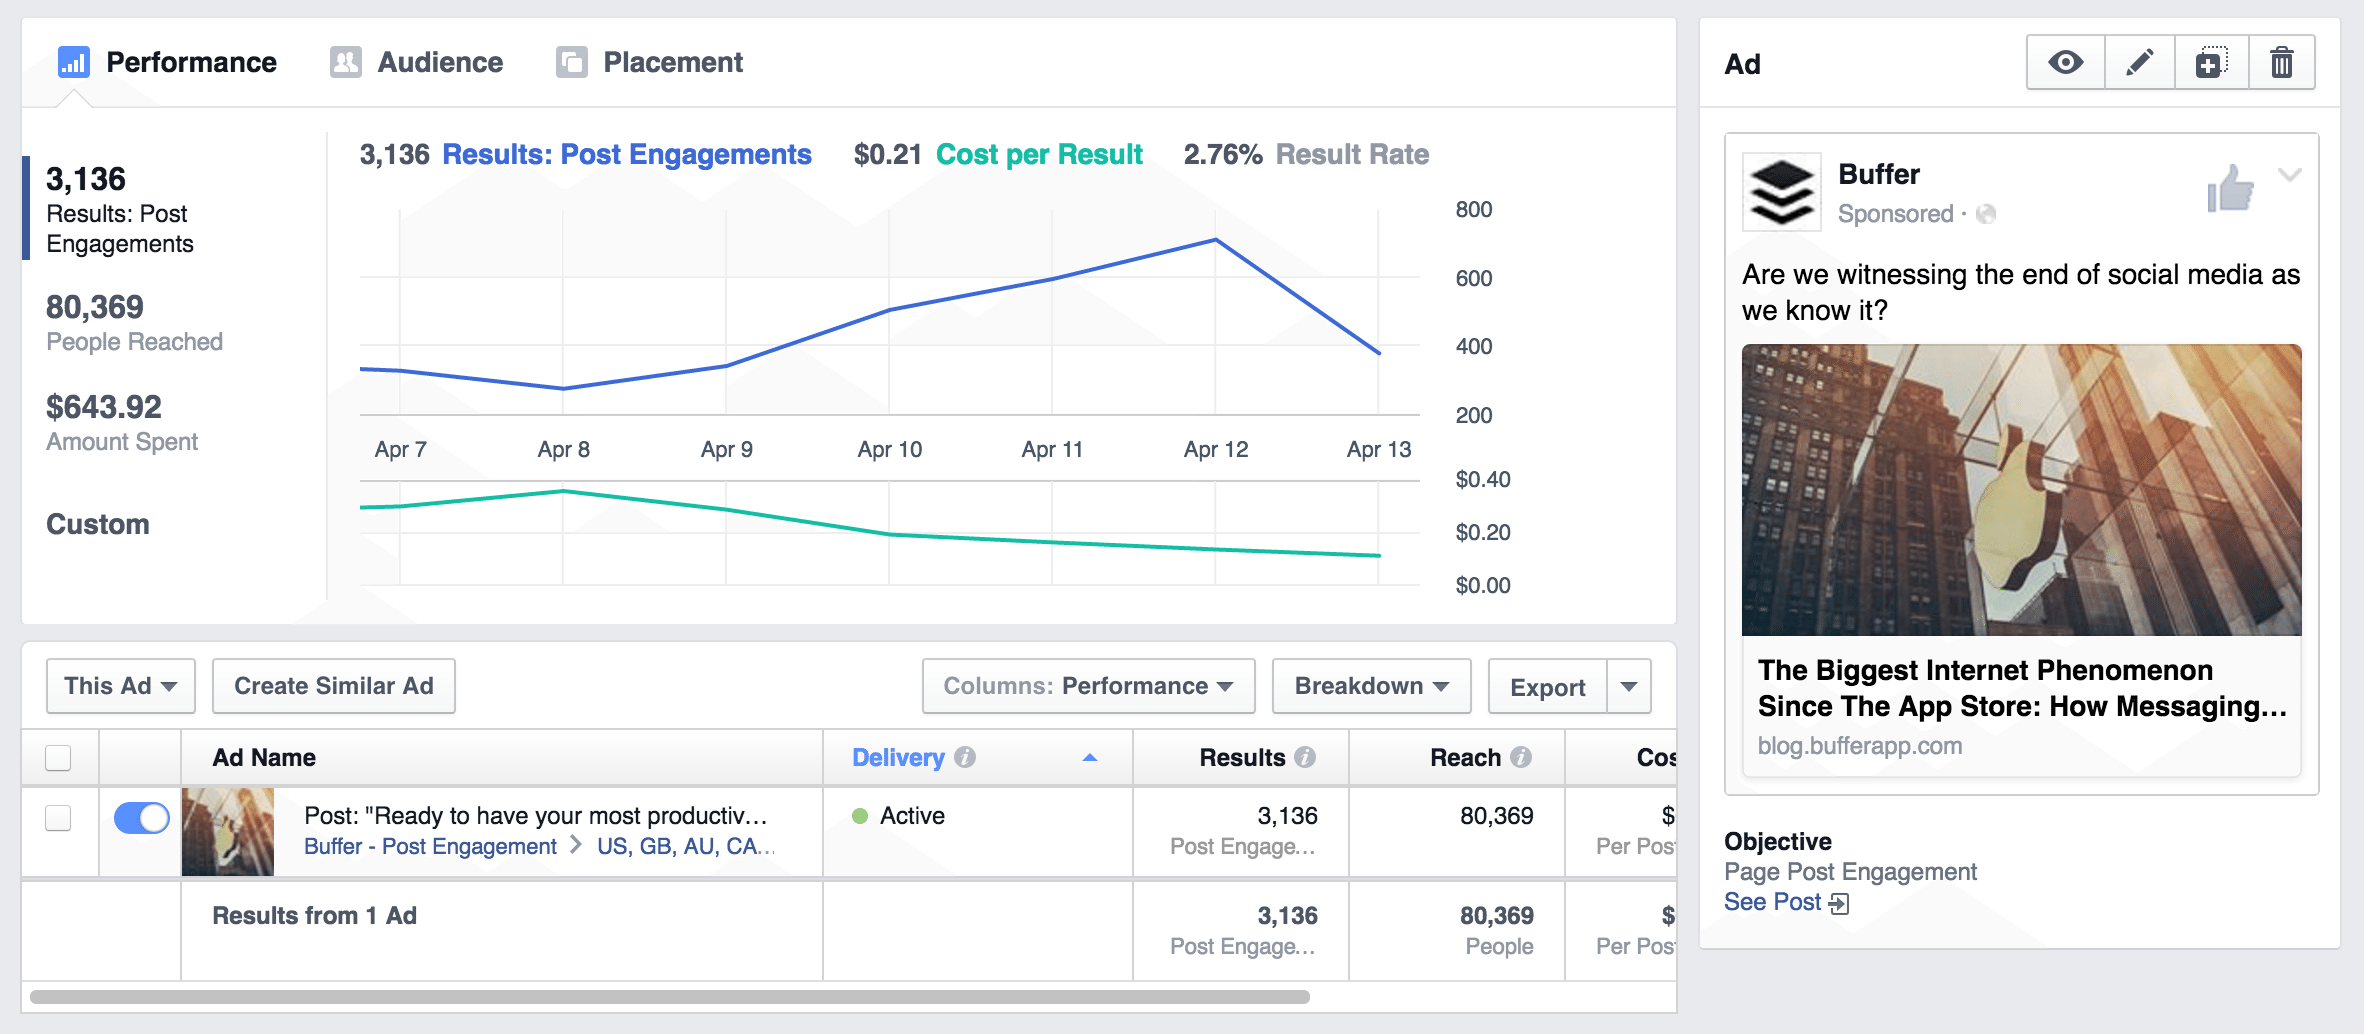
For ads, by default, you see these stats (in addition to a thumbnail and text preview of what the ad looks like):
- Delivery – “Is this ad running?”
- Results – “How many actions has this ad received?”
- Reach – “How many people have seen this ad?”
- Cost – “How much am I paying, on average, for each action?” (Might also be known as, cost per click)
- Amount spent – “How much have I spent total so far on this ad?”
- Relevance score – A rating of 1 to 10 for how well the audience is responding to the ad
To drill down even further, you can click on each individual ad to see charts and stats specific to that ad.
Conversion tracking and pixels
Facebook has a unique system for tracking actions that occur after someone leaves a Facebook ad and travels to a web page. You can install a Facebook pixel that tracks things like page views, registration, and orders.
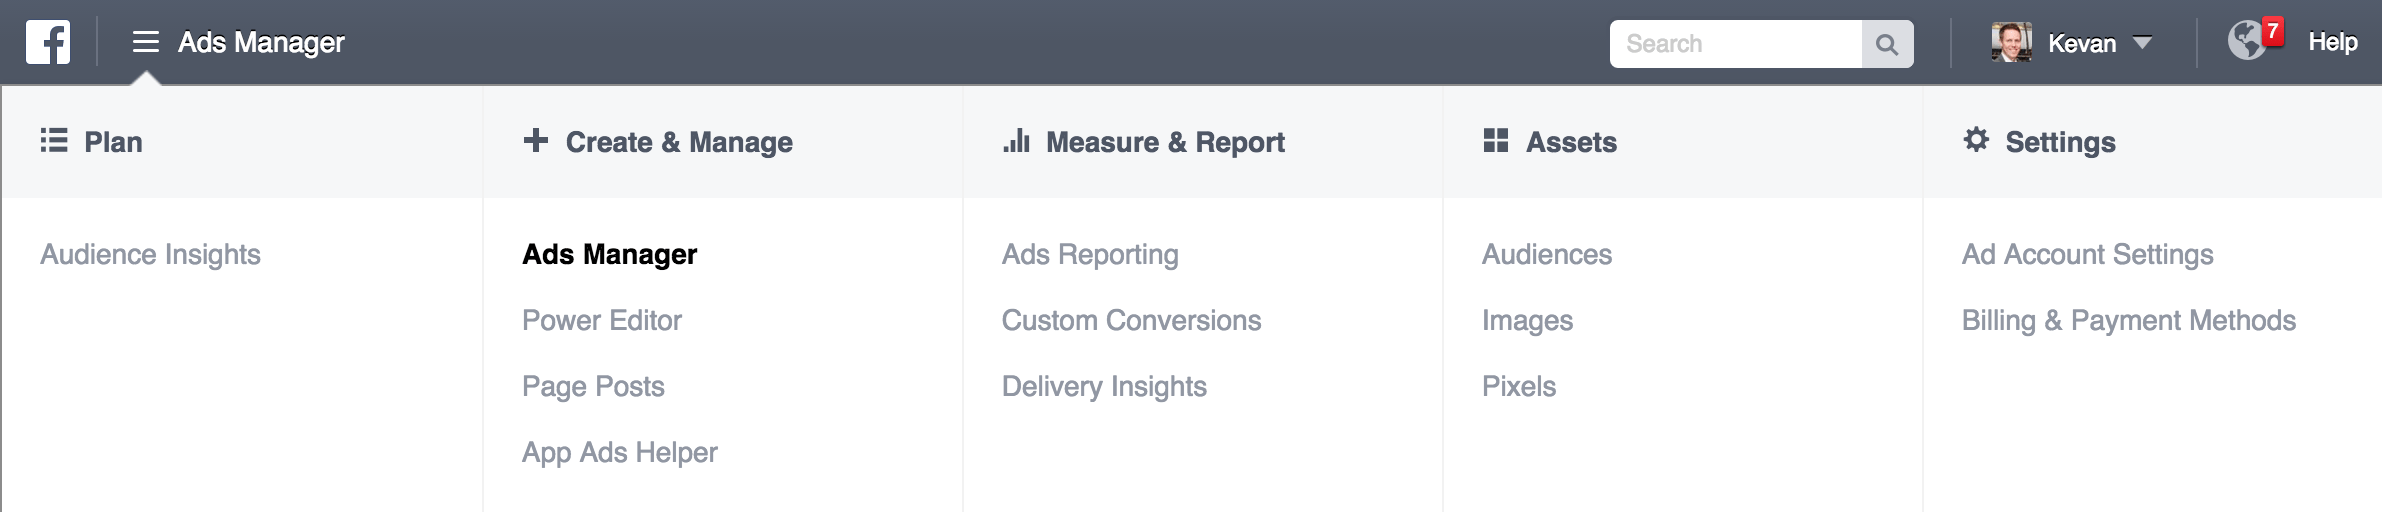
To get your Facebook pixel, go to the menu at the top of the page, and select “Pixels” under the “Assets” menu.
From the pixel page, click Create a Pixel. Then click View Pixel Code.
The pixel code goes into the code of your page, in the <head> section. You can copy and paste the code from Facebook into your page, and for further tracking, you can add any number of variables to your code from Facebook’s many options.
- View Content
- Search
- Add to Cart
- Add to Wishlist
- Initiate Checkout
- Add Payment Info
- Purchase
- Lead
- Complete Registration
For example, if you were to add extra conversion tracking for Leads to your Facebook code, you might take the original code from Facebook and add in the extra snippet for Leads to the page where your lead capture takes place.
<!-- Facebook Pixel Code --> <script> !function(f,b,e,v,n,t,s){if(f.fbq)return;n=f.fbq=function(){n.callMethod? n.callMethod.apply(n,arguments):n.queue.push(arguments)};if(!f._fbq)f._fbq=n; n.push=n;n.loaded=!0;n.version='2.0';n.queue=[];t=b.createElement(e);t.async=!0; t.src=v;s=b.getElementsByTagName(e)[0];s.parentNode.insertBefore(t,s)}(window, document,'script','https://connect.facebook.net/en_US/fbevents.js');fbq('init', '432799013584355'); fbq('track', "PageView"); fbq('track', 'Lead'); </script> <noscript><img height="1" width="1" style="display:none" src="https://www.facebook.com/tr?id=432799013584355&ev=PageView&noscript=1" /></noscript> <!-- End Facebook Pixel Code -->
Facebook Ads Frequently Asked Questions
Do I have to have a Facebook page to run an ad?
You can create an ad for a website without a Facebook Page. However, you can only do this with ads that generate clicks for a website. Here’s how it works:
- Go to ad creation and then select Clicks to Website
- Enter the URL of the website you want to create an ad for and then click Continue
- Fill in the details of your ad and then click Place Order
What is a lookalike audience?
A lookalike audience is a collection of Facebook users who are similar to your Facebook fans, website visitors, or customers.
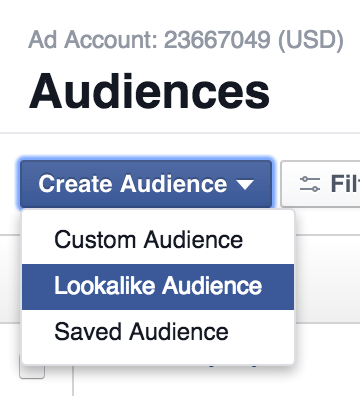
You can create a lookalike audience from the Audiences section of Facebook Ads (from the menu, it’s under Assets > Audience). Click to “Create Audience,” and choose “Lookalike audience” from the list.
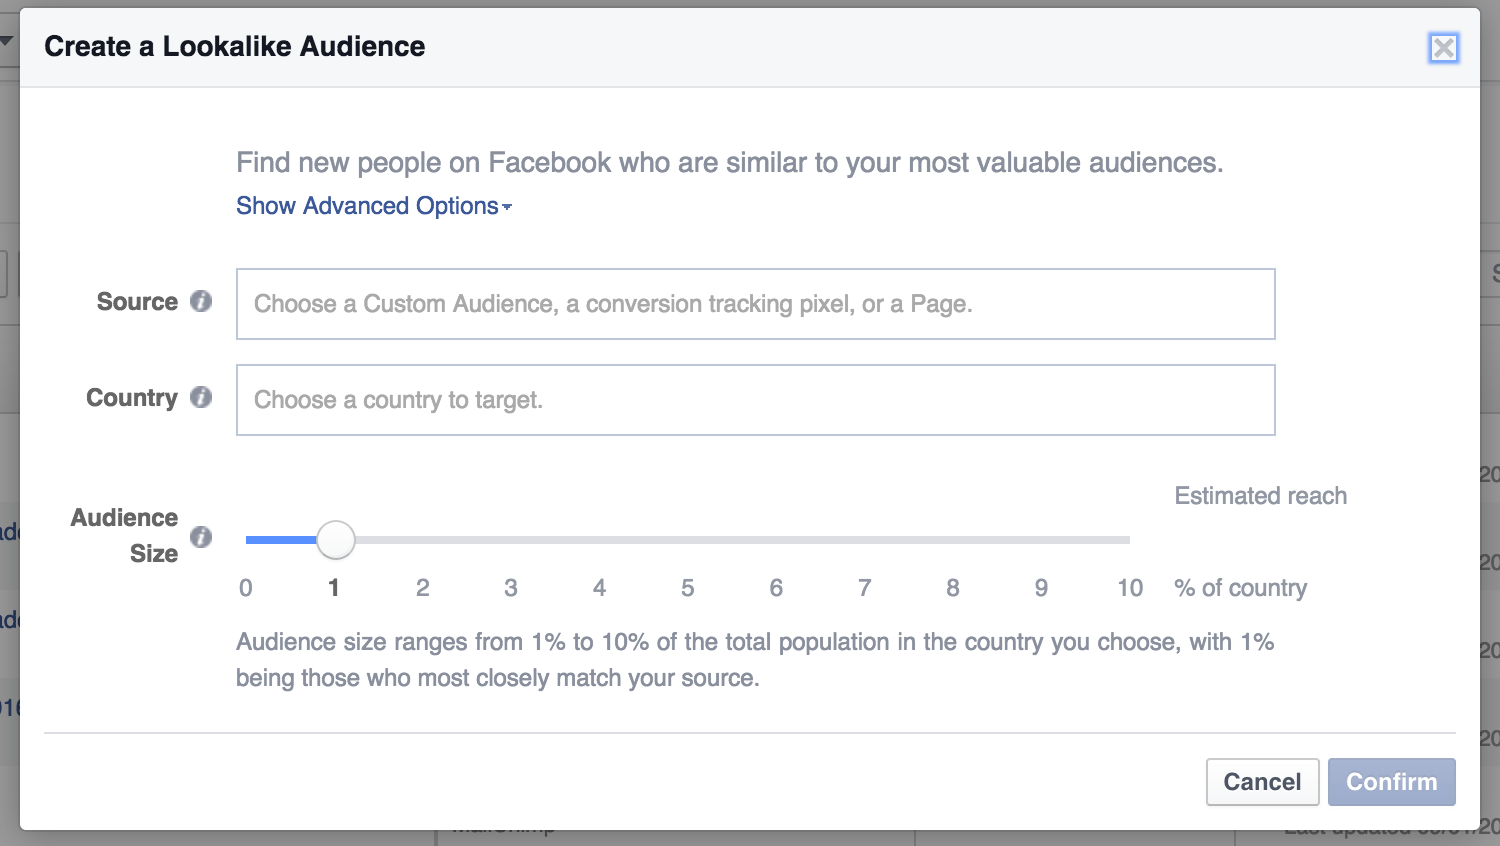
Setting up the audience, you start by selecting a source for Facebook to compare with. This can be an existing custom audience, traffic from a tracking pixel, or the fans from a Page.
Lookalike audiences work for one country at a time, so after selecting a main source, you’ll next select the country to choose among.
And finally, the last step is to set the size of the audience. You can drag the bar back-and-forth to select between 1% and 10% of the country’s residents for Facebook to analyze and compare.
What are dark posts?
Dark posts are normal-looking Facebook updates that are intentionally never shared organically and only served as ads. You can create dark posts through the Facebook Ads power editor.
What is the power editor?
The power editor is for those who may wish to create large amounts of ads at once and have specific control over how the ads are served. You can access the power editor through the Facebook Ads menu, under “Create & Manage.”
What is the audience network?
The Audience Network placement extends your ads’ reach by showing them to the same target audience on other mobile apps and mobile websites approved by Facebook.
5 Popular strategies and Facebook advertising tips
There’s a host of great information out there on Facebook advertising tips and best practices. Ad Espresso has a wonderful blog, the Facebook content on Moz is outstanding, everything Jon Loomer writes is incredible.
We’ve collected some of our favorite tips and tactics for Facebook ads here. We’d love to hear what’s worked for you, if you’re up for leaving us a comment!
1. Consider the placement of your URL
from Karen Jones, How Facebook Advertising Performed vs. Google Ads
This article is chock full of useful tidbits: the pros and cons list from earlier came from Karen’s great work here. She goes on to recap some of her top takeaways for successful Facebook ads.
- Keep your information short
- Include an offer or price
- Include keywords
- Include persuasive or interesting imagery/video
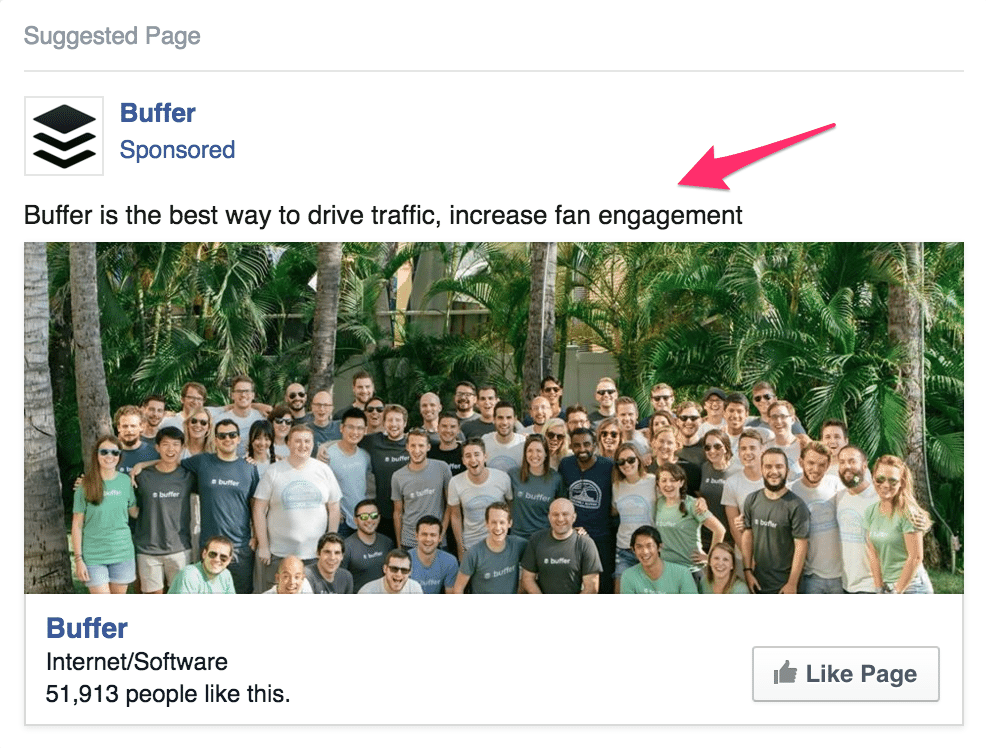
- Include your URL above the image/video in the text section
- Use taglines and hooks to draw your potential customers in (i.e., “Make This a Year to Remember”)
2. Don’t wait: Double down on what’s working
From Massimo Chieruzzi, Facebook Ads Suicide: 6 Deadly Errors to Avoid
The team at AdEspresso has some fantastic advice on best practices for Facebook advertising (they’re drip campaign emails for new signups are particularly fantastic).
Double down on what’s working: don’t wait to increase your spending on a great Adv. Down the line it might not work any more — or just not as well!
Don’t ignore New Features and Ad Types: every new format will over-perform in the first few months before users are familiar with it!
Test every aspect of a campaign: the wrong picture can cost >100% more. But you’ll never guess which one without split testing for it!
Don’t leave campaigns alone: on Facebook you target users based on interests and demographics. They’ll get tired of seeing your ads over and over again!
3. Spend at least $5 per ad
Andrea Marban, The Dos and Don’ts of Facebook Advertising
Another gem from AdEspresso, this one covers the do’s and don’ts of Facebook advertising and gets into some wonderfully specific advice.
Do:
- create Buyer Personas and a specific call to action for each of them
- choose an image that stands out, but also represents your brand
- include Social Proof in your Ad, numbers can work very very well
- use Custom Audiences, it’s one of the most effective tools as of now
Don’t:
- allocate too small of a budget (best is at least $5 per ad, typically)
- use too small or a poorly designed image (use a minimum pics’ width of 1024px)
- mix different countries in an AdSet (best is to target one country per AdSet)
- have too small of an audience (best is usually at least 500k people)
- Be aware that the elements above can impact significantly your campaign, so taking some time to understand and fine-tune them is an investment that will pay off in spades
4. Image tips
Fred Perrotta, A Deep Dive Into Facebook Advertising
The most important part of your ad is the image. You can write the most brilliant copy in the world, but if your image doesn’t catch a user’s eye, you won’t get any clicks.
Don’t use low-quality images, generic stock photography, or any images that you don’t have the rights to use. Don’t steal anything from Google Images. Unless you’re a famous brand, don’t use your logo.
Images of people work best. Preferably their faces. Use close-ups of attractive faces that resemble your target audience.
Facebook ad images are small (100 x 72 pixels). Make sure to focus on a person’s face and crop it if necessary. Don’t use a blurry or dark picture.
Advanced tip: Use images of people facing to the right. Users will follow the subject’s line of sight and be more likely to read your ad text.
5. Segment more than you think you should (and don’t overlook mobile!)
Kane Jamison, 10 Things I’ve Learned While Learning Facebook Ads
I love this post from Kane about his learnings with Facebook Ads. It’s a great primer for beginners (with something to be learned for pros, too, I’d imagine).
Here are a couple of my favorite takeaways:
Make sure the creative imagery and copy is tightly targeted to your audience. Instead of targeting an audience of 2,000,000 people, find a way to break them into smaller, more specific groups, and show them customized copy and graphics that will appeal to them.
Kane mentions that you can even go so far as to select an audience of cyclists if you have a cyclist in your ad creative. Awesome!
And here’s a great tip on mobile vs. desktop:
Regardless of the age or demographics of the audience you’re targeting, don’t assume that they’re scanning through a laptop Facebook feed just because you’re on a laptop all day while editing ads.
The vast majority of Facebook users are on mobile apps, and many of your ad sets may never get a click from desktop users.
Final thoughts and your thoughts
Thanks so much for taking the time to look through this guide. As I’ve mentioned, there’s so much to know on Facebook – we’d love to help as much as we can if there are any questions or tips you’d like us to know. And if you spot anything that’s changed about Facebook Ads since we’ve published, we’d be grateful for the heads up. Things move fast!
What has your Facebook Ads strategy looked like?
What kind of results are you seeing?
It’d be really great to get your thoughts in the comments. Chat with you there!
Read more and learn more
These are some really great sites that have helped us learn a ton with social media ads and Facebook advertising in particular:
Thank you!
Image sources: Pablo, WOTIC
Try Buffer for free
140,000+ small businesses like yours use Buffer to build their brand on social media every month
Get started nowRelated Articles

Black Friday and Cyber Monday marketing guidance to help you stand out from the crowd — complete with tried-and-tested examples.

When marketers wish for more time and resources, they often wish to spend it on video marketing. Well, what if you only needed six seconds of video to make your impression? The current run of 6-second ads on platforms like YouTube and Twitter has opened up new options for marketers who are looking to get their mess

There has been much discussion recently on industry-leading publications about the effectiveness of video on social media. For example, did you know that video posts on Facebook receive at least 59 percent more engagement than other post types? Since our 2017 research with Animoto comparing square vs. landscape video, little has been published around the impact of video format on overall video engagement. Specifically, vertical video vs. square video. While we know that square video (1:1