The Complete Guide to Getting Started with Facebook Ads


Here is something I realized pretty quickly: Getting started with any type of online paid advertising can seem overwhelming. Yet, there are two online platforms you just can’t avoid: Google and Facebook.
With over 1 billion active users, Facebook is one of the most important social networks for advertisers, and whether you like it or not, it’s something every small business should attempt to master. In fact, according to a study from Pew Research Center, 30 percent of Americans get their news from Facebook as opposed to turning to Google or a news organization. It’s clear the social network giant isn’t going anywhere anytime soon.
If you haven’t even touched Facebook advertising yet, don’t sweat it. No one can be behind the game when it comes to Facebook, and in fact, there are many new features and tips that even the most advanced Facebook advertisers can still learn.
If we’re getting really honest here, I set out to write this article and learned things that I didn’t realize existed. When you go to create an ad you assume you’re going to be taken through the steps to make it happen, and you are, but who knew there were so many different kinds and image considerations? These are things that you can miss unless you really dig deep and do some research into the different options you have that aren’t explicitly stated.
It’s important now more than ever to ask yourself that dreaded question: How can I get started with Facebook ads? We tried to make it super easy here today, let’s dig in:
The 4 Different Types of Facebook Ads
Before you can get started creating a Facebook ad you have to understand all of your different options to determine what works best for you. The different Facebook Ad options include:
- Marketplace Ads. These are the standard Facebook ads and a typical starting point for most small businesses.
These are the ads you see on the right hand sidebar of your Facebook newsfeed and they allow advertisers to choose where the ad will send those who click—a company Facebook page, specific landing page, etc.—and gives advertisers a 25 character headline, 90 character short description, and an images that’s 99px X 72px. You also have the power to target your ads and have them shown to audiences based on demographics, location, specific interests, etc.
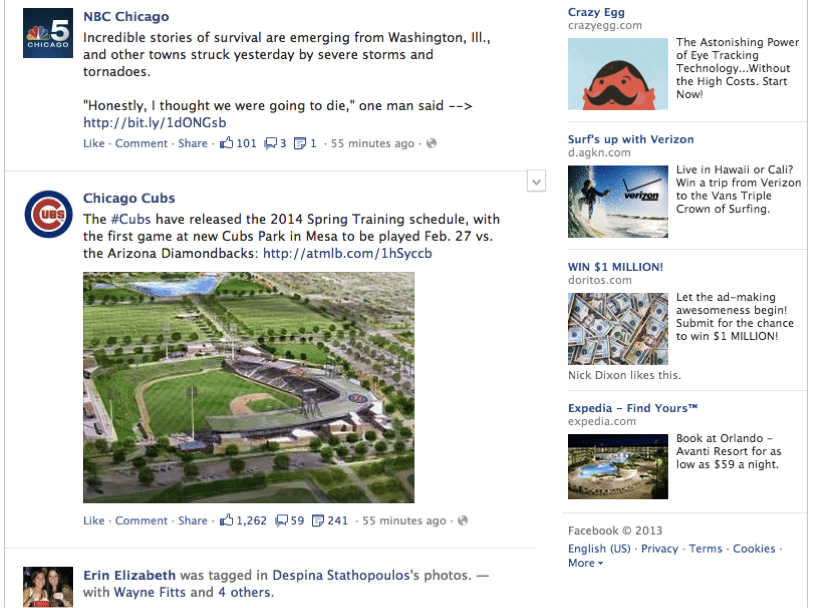
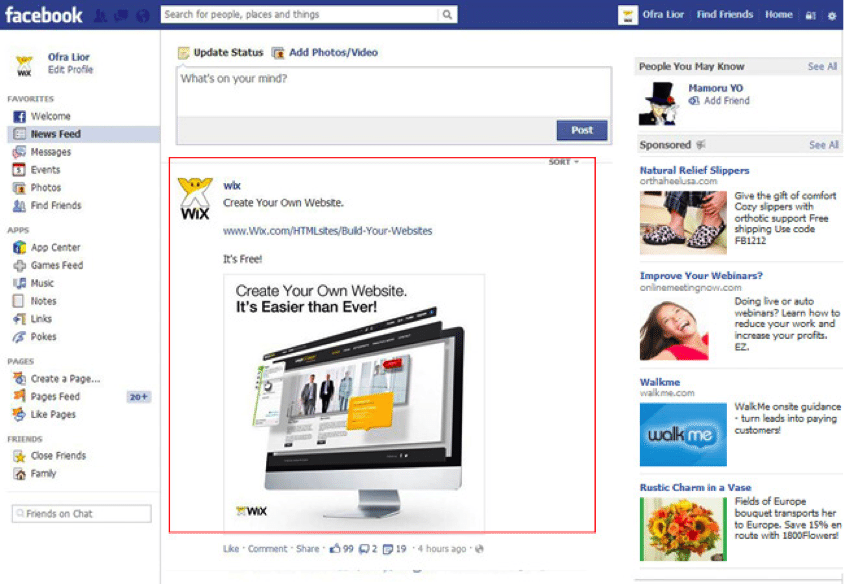
- Page Post Ads. These ads show up on a user’s newsfeed the same way any regular status post would appear.
These ads are a little bit controversial because user’s don’t typically want ads right there amongst all of the updates from their friends, but they’re still effective nonetheless. This is a newer form of advertising on Facebook and allows advertisers to include links, photos, videos, etc., and it’s typically the most successful type of advertisement because it shows up right where a user’s attention is focused. Below is a screenshot from wix.com:
- Sponsored Stories. These ads show up in a person’s newsfeed if one of his/her friends engaged with the company Facebook page recently.
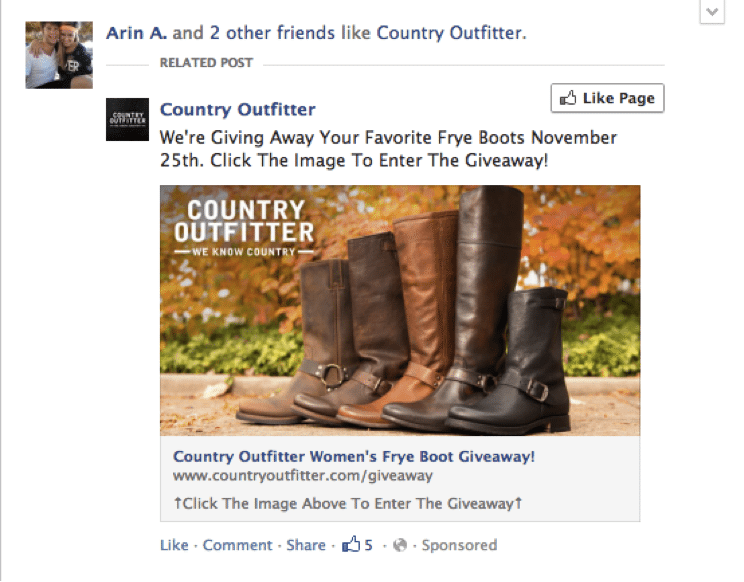
People are typically more apt to trust a product or service if their friends know about it or have used it in the past. People can show that they know about a product by engaging with a company Facebook page whether it be through likes, comments, reviews, adding a photo, etc. A sponsored ad means that your ad will show up on the newsfeed of that person’s Facebook friends. In the example above, the sponsored ad might say that three of my friends liked this Facebook page, and even though I haven’t “liked” it yet, it’s still showing up in my newsfeed.
- Promoted Posts. These ads can only be shown to your existing fans and your existing fan’s friends.
These posts will allow you to make sure that a large percentage, which you can choose based on how much you pay, of your fans will see your ad in their newsfeed. You pay Facebook a flat rate to make this happen (so it is not a pay-per-click system). These ads will look the same as sponsored stories; the payment is just different.
You follow the exact same steps to setup all of the different types of ads discussed above, so it helps keep things simple and make that once “dreaded” question seem a little bit more manageable.
Step-By-Step Guide: How to Setup a Facebook Marketplace Ad in 10 Easy Steps
Setting up a Facebook marketplace ad is actually quite simple.
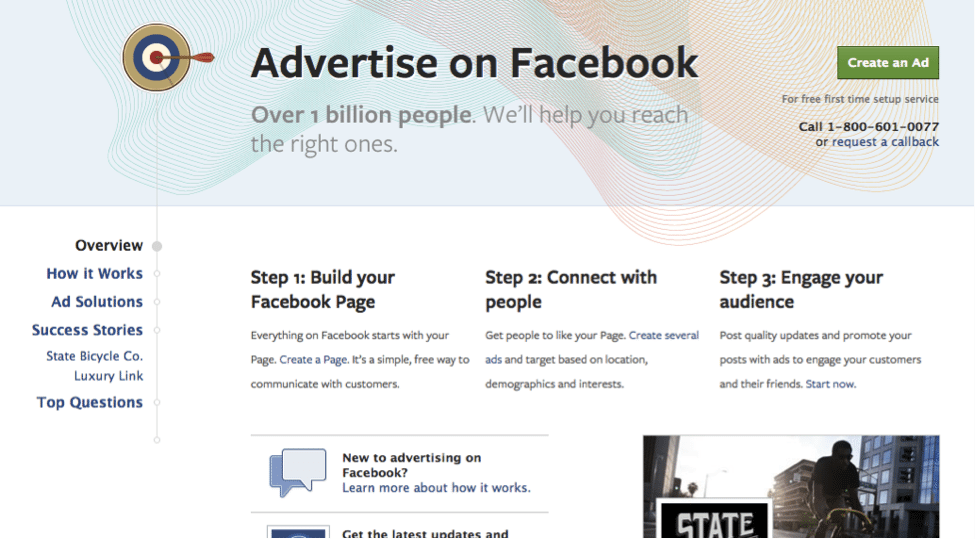
Step #1: Find the “Create an Ad” button.
You can visit this link to find the “Create an Ad” button. You’ll then be taken to a page that looks like the screenshot below where you can click on a link to learn more or just jump right into it and start creating your ad.
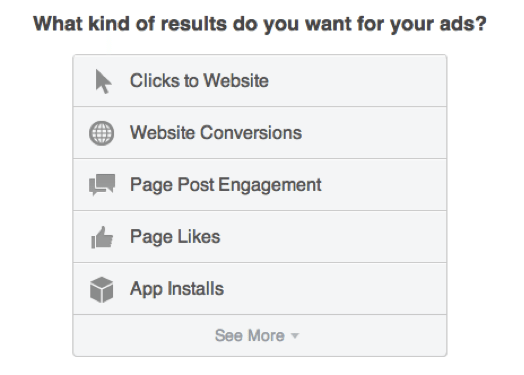
Step #2: Choose what kind of results you want for your ads.
You can choose between Clicks to Website, Website Conversions, Page Post Engagement, Page Likes, App Installs, App Engagement, Offer Claims, and Event Responses. For the purposes of this example, let’s click “Clicks to Website.” Simply type in your URL and you’re set to go to the next step.
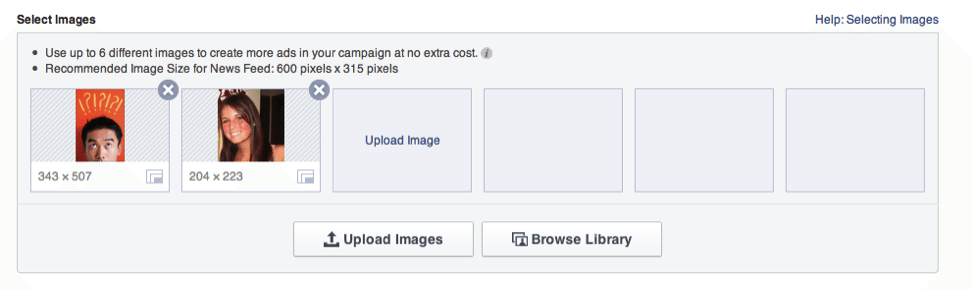
Step #3: Upload photos for your ad.
You’ll then be taken to a page where you can scroll down and follow directions. This starts with uploading a photo that you want to use for your ad. You can add up to 6 images, which should be 600px X315px for the best results.
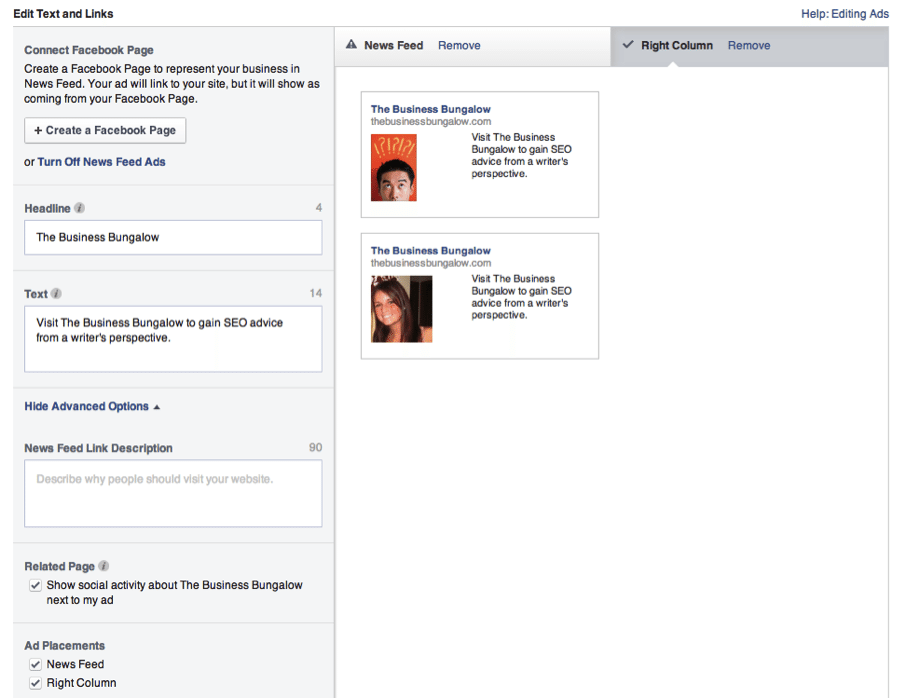
Step #4: Connect your brand’s Facebook page.
Your ad can still send users to your website, but it will make it look like your ad is coming from your Facebook page (which looks a little bit more natural) if you connect your page with your ad. This is highly recommended and I personally have seen the benefits of not missing this step–it was something I missed at first and then tried only to find a huge increase in “likes.” From a consumer standpoint, this is also appreciated and can help you trust that company.
Step #5: Add your headline and description.
You can add your headline and description you want users to see. You have 25 characters for a headline and 90 characters for your description.
Step #6: View how your ad will look when shown in a newsfeed (sponsored ad) or in the right hand sidebar (marketplace ad).
This is the time to make sure everything looks right. In order to have your ad show up in a user’s newsfeed, you must have it attached to your Facebook brand page. Below is a screenshot that shows how you can get started with the last 3 steps described above:
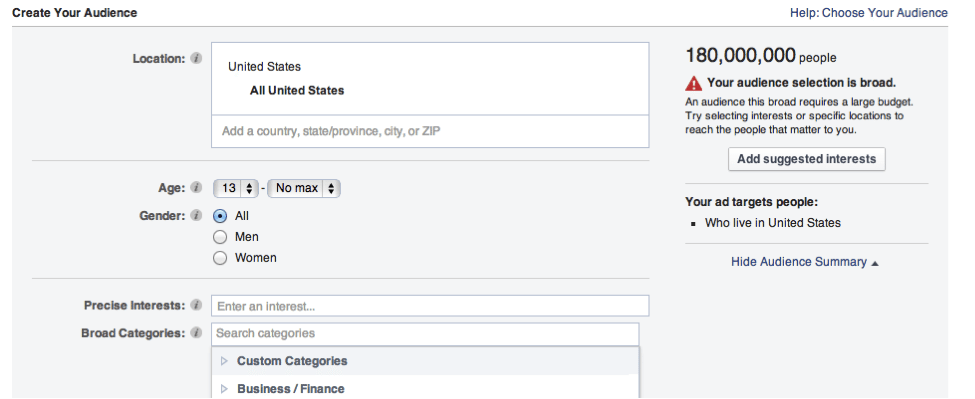
Step #7: Create your audience.
Facebook then gives you a series of choices regarding your audience including location, age, gender, precise interests, broad categories (entertainment, jobs/education, etc.), connections, friends of connections, interested in (for the users), relationship status, languages, education, and workplaces. Facebook will give you a number on the left hand side of your screen that lets you know if your specifications are too broad.
Step #8: Create your account and campaign settings. Once you’ve created your ad, information in this section cannot be changed.
This is where you can name your campaign and set your budget as well as when you want your ad to run (you can schedule the ad to run next month, for example, so you can create it ahead of time). Do not forget to give your campaign a unique name so that you can keep things straight in the future. As you can see below, if I don’t create a name the name of this campaign would be “http://www.thebus…-US-13-65.” I’ve dealt with this before in the past and I can’t stress enough the importance of this point. You might think you’re only going to create one or two ads so it won’t be an issue, but you’d be surprised how success can change this mentality (in a good way!).
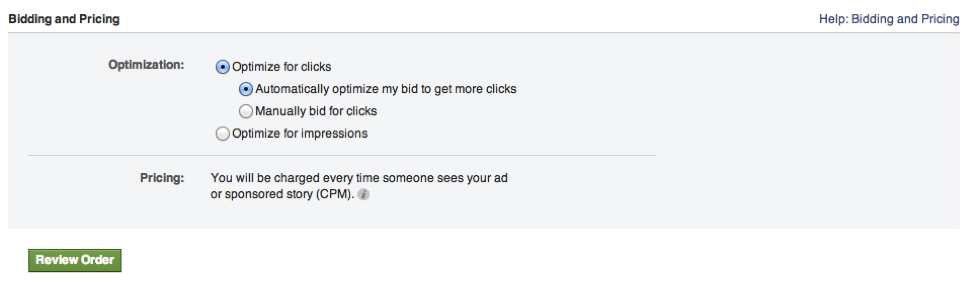
Step #9: Let Facebook know how you want to optimize your campaign and then hit “Review Order.”
You have the choice to automatically optimize your bid to get more clicks (this according to Facebook), manually bid for clicks, or optimize for impressions. Hit “Review Order.”
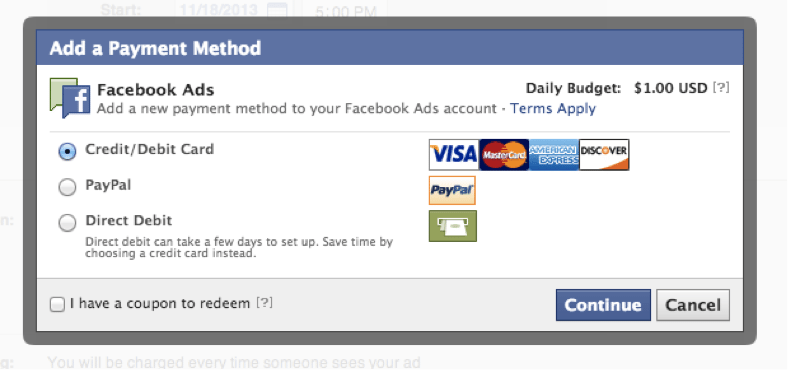
Step #10: Place your order and pay for your ad.
Once your ad is set to go, a screen will pop up asking you how you want to pay. Choose your desired method—credit card, PayPal, direct debit, or redeem a coupon—and hit “continue.” Fill in your information and you’re all set!

How to Manage Your Facebook Ad
Once your ad is created, managing your ad is very simple. Visit the Ads Manager link and you’ll see a list of all your campaigns (you can find this on the left hand side of your Facebook profile under “account.” If you have more than one account, that will also be an option and you can just click on the account associated with the ad you want to manage.
Managing your ad means you can change the time the campaign will run, how much you want to spend, and what the ad looks like. What’s really cool, however, is the idea that you can always check back on the success of your ad by looking at the “results” section or clicking on “full report” to get more detailed information.
So what comes next? After you understand how Facebook ads work and how to setup your first Facebook ad, you need to shift your focus to optimization. This means making sure your ad is drawing in readers and getting placed in front of a relevant audience. Facebook will help walk you through these steps, but it helps to have a plan first and understand what your best decisions.
You can visit this link to learn how to get started on this next step. I personally have found that’s it’s the optimization aspect of Facebook ads that people miss. Back when I first got started working in online marketing, I originally connected optimization with organic traffic and content for organic search assuming there was only so much you could do with an advertisement. Boy was I wrong.
Do you have any tips for advertisers looking to setup a Facebook ad? What were some problems you’ve had in the past, and how did you fix them? Let us know your story and your thoughts in the comments below.
PS: If you enjoyed this article, you might also like: “7 Powerful Facebook statistics you should know for a more engaging Facebook page” and “A scientific guide to posting Tweets, Facebook posts, Emails and Blog posts at the best time“
Try Buffer for free
140,000+ small businesses like yours use Buffer to build their brand on social media every month
Get started nowRelated Articles

Black Friday and Cyber Monday marketing guidance to help you stand out from the crowd — complete with tried-and-tested examples.

When marketers wish for more time and resources, they often wish to spend it on video marketing. Well, what if you only needed six seconds of video to make your impression? The current run of 6-second ads on platforms like YouTube and Twitter has opened up new options for marketers who are looking to get their mess

There has been much discussion recently on industry-leading publications about the effectiveness of video on social media. For example, did you know that video posts on Facebook receive at least 59 percent more engagement than other post types? Since our 2017 research with Animoto comparing square vs. landscape video, little has been published around the impact of video format on overall video engagement. Specifically, vertical video vs. square video. While we know that square video (1:1